I’ve been writing a lot lately about photography. I’m sorry if I’ve been neglecting other topics for this… but it’s been on my mind quite a bit.
Tonight I’d like to discuss some thoughts on exposure. Some things I’ve learned from books, and a few things I’ve learned from experience.
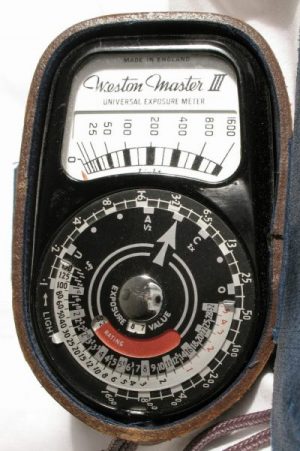
First, you need to understand that the meter in your camera isn’t magic, and (in the case of newer cameras) it can only do what it was programmed to do. When cameras first started having meters built into them, they generally tried to average the entire scene to give a, hopefully, accurate reading so your photo would be properly exposed. As cameras advanced, the idea of weighting the center portion of the image area a little higher than the rest became popular (since your subject was many times in the center). Then someone had the idea of maybe weighting the bottom half of the image area heavier, since landscapes took up that portion of the screen. Then spot metering became popular, so you could measure the light in the center portion of the image area alone. Every camera company had it’s own way of combining these types of metering – the way they thought was best, or most accurate.
In the late 1970’s and into the 1980’s camera companies started using microprocessors in their cameras. Starting with Canon’s AE-1 in 1976, Canon followed up with the A-1 in 1978, and a programmed auto exposure mode. Programmed auto exposure caused the camera to select both aperture and shutter speed automatically.
Now, the introduction of the microprocessor, in my opinion, was probably the single most significant photographic development in the past 50 years. Like other industries, the camera industry had fallen prey to high technology! So, exposure meters had been tuned to weight areas of the image area heavier or lighter, but that was about the most sophistication that could be done without computers. Imagine how much more accurate the camera could be at calculating exposure if it could remember the best way to expose a specific scene. If the camera knew you were photographing a person, it could customize the exposure for portraits. Imagine if the camera could evaluate a scene and scan through thousands of scenes in memory looking for a match – recalling the best exposure method. Well, this is just one example of how a microprocessor could help a camera determine a more accurate exposure. For the first time, landscapes were exposed differently from portraits. Some backlighting could automatically be adjusted for. Close-ups were exposed differently than distant scenes. All automatically – so the camera was becoming more intelligent. Today’s cameras are highly dependent upon the microprocessor, and exposure meters are light years ahead of those from the 1970’s and 1980’s.
So, what does all this mean? I thought a history lesson would help to understand where we are, and where we came from – with exposure meters built into our cameras. And, I want you to understand that even though cameras are very good, they’re still not perfect, and they still make mistakes. So, here’s a little introduction to exposure control, and my hope is that you will start to understand how to calculate exposure manually, and you will be able to set your camera to manual mode and have good results – maybe better results than you had in automatic modes. I think this truly unleashes us as photographers to be artists.
The plain vanilla, non programmed exposure meter, will try to indicate settings that will lead to a resulting image that’s a medium gray in tone. Generally, since you don’t usually take a photograph of just one color or shade, an average exposure measurement of an entire scene, will hopefully average out to something close to correct. If part of your image contains large areas of darker shades or lighter shades it won’t be exposed properly. So, you, as an experienced photographer must recognize these kinds of scene irregularities, and would change your exposure appropriately.
In college, back in 1979, I first learned about the zone system for calculating proper exposure based upon light and dark areas of your scene. The zone system, in very basic terms, divides any scene into zones, 0 through X, based upon luminance. A simple example is this. If you point your camera at a completely black wall, use your meter, and take a picture, the resulting image will turn out medium gray. To compensate, you would take a meter reading of your black wall, decide it should be in a zone 1 or 2 and underexpose 2 stops to put your black wall in zone 2, or 3 stops to put your wall in zone 1. Medium gray is zone 5 in the zone system. In a scene with many shades, you should find an area you visualize as zone 2 (the darkest area with some texture, according to the zone system) and take a meter reading of that spot only – and then stop your camera down 3 stops to make it turn out as dark as you visualized.
So here’s your assignment. Go “Old School” and turn you camera to manual mode. Don’t just do things the way you always have – don’t just point your camera at the scene, set your exposure (maybe not even that), and snap a picture. Visualize your scene. Determine which areas are your dark areas where you want to see some texture, and which are your light areas with some texture, and expose for those areas individually. For black and white negatives, we always exposed based on the shadows. For positives (slide film) we exposed for the highlights. With digital cameras I’ve read that you should expose for the highlights.
The original zone system was developed based upon the range that film of that day could handle – so highlight with detail visible would fall into zone 8, and shadow with detail visible would fall into zone 2. Your digital camera may or may not have as much range (called dynamic range) as film had – but I think most modern digital cameras match or exceed the dynamic range of film.
So, play around with your camera – either film or digital – and let me know how you do. I’d love to hear what you can create!
