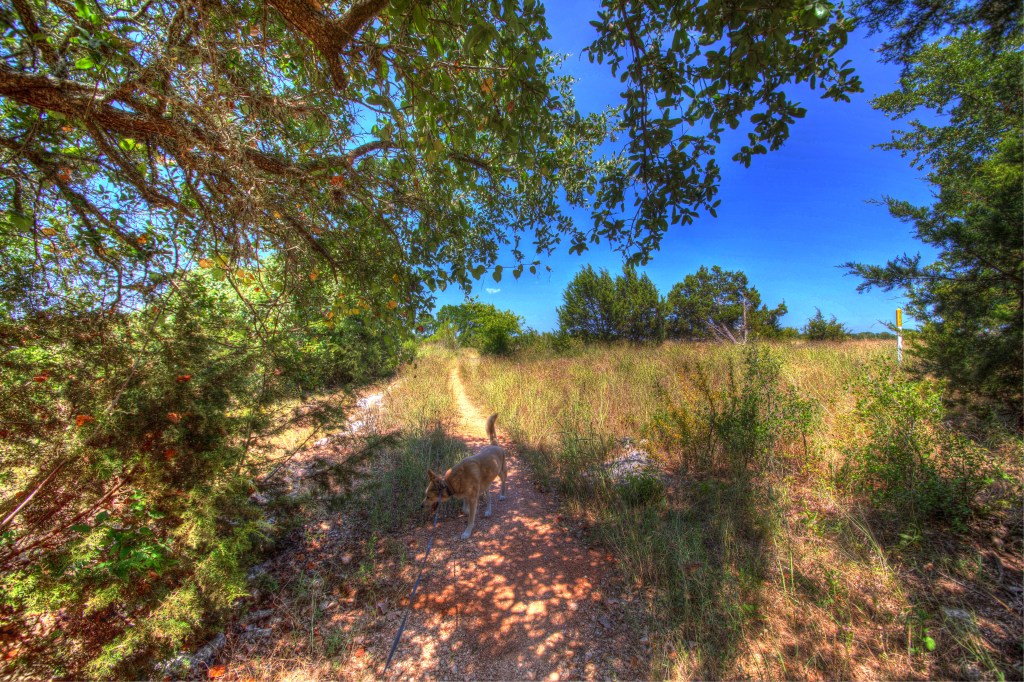
Today I decided to take my dog for a walk at a local park. It sounded like a great idea – and after about 20 minutes we both realized, “This was not a good idea”.
It was a beautiful clear day in central Texas. The sky was nearly cloud-free, just the way I like it for photos. The only problem is that it was 98 degrees Fahrenheit (and getting hotter), so it wasn’t ideal for walking – about 20 minutes was all we could handle. The trail we were on, has very little shade – so the sun was beating down on us relentlessly.
But as long as I’m out here, I thought, why not take some photos in the bright sun in hopes of getting some good shots to demonstrate HDR photography, and what it can do to help with extremely high contrast scenes.
HDR is short for High Dynamic Range. So, you already understand that your images, whether digital or analog, can only render a certain range of light and color before it’s just all black or all white. You notice this when you take a photo outdoors, and expose for a foreground subject, and the sky isn’t blue anymore. It turns very light blue, or just white because it’s so bright compared to the foreground. Using HDR can help your image to display more color and details in both the shadows and the highlights. In some of the images I shot today, you will see that without HDR, even the leaves on the trees are basically too dark to see detail in. With HDR, the leaves have color and texture because of how the images, of varying exposures, are merged.
With digital cameras, you have a couple options for creating HDR images. The first is the traditional way – you would shoot multiple, bracketed images of the same scene – then merge them together in post processing to create an image that has extended range. The second method is the method I prefer. You only take one shot, captured as a RAW image – so we aren’t constrained by the post-processing limitations of JPG images. With a single RAW image, you can create your bracketed images in post processing. So, I generally start with my RAW image, then save 3 JPG images – one at normal, default exposure, one at -2 EV and one at +2 EV. That basically gives me the same result as taking 3 bracketed exposures – but I don’t have issues with the bracketed images actually being separate images – where branches or people may be in different positions in each shot.
If you’re using film, you only have the first method available to you. I haven’t done this with film, so I’ll stick to describing my digital process.
I use Photomatix Pro, but even Lightroom and Photoshop have ways to merge separate images into an single HDR photo. I have been using Photomatix for quite a while, and once you get used to something, it’s just easier to get the job done with that software. There are other options out there – but I like Photomatix the best.
Once you see what HDR photographs look like, I think you’ll be able to spot an image that’s been processed this way. I like the results, but I also know that some people over use the technique to make photos that are very unnatural looking – they go to extremes. This can be used, though, as an artistic process to make your photos look very different – mainly through exaggerated saturation levels. I prefer to make my photos as “real” looking as possible – to make the images as close as I can to what I see with my eyes. Just a side note – our eyes are amazing! Sometimes, when I’m in a particularly beautiful place, I take a brake from photography, and just soak in the views. I’ve seen some beautiful places that my camera, and all kinds of special processing, could never reproduce.
So, now you have a basic idea of how this is supposed to work. Let me show you some examples of the results. Each row contains 2 photos. The first is without post processing. The second is with. Some have been processed to have the colors more saturated, and some are more modest. Take a look, and let me know what you think. Better yet, you can download a trial of Photomatix and give it a try yourself!


You must be logged in to post a comment.