
Before cameras had meters built in, you had to use a dedicated light meter (or just know what you were doing). Even if I know what the settings should be, I like to check conditions with a meter, just to be sure. I guess I’m not good enough to trust myself. Long ago, that’s the way it had to work though. You kept your own charts on exposure. Kodak used to include charts in their film boxes (the instructions) that advised of the proper settings for different lighting conditions.
I don’t do it often, but using an external meter helps you understand light. I use a Sekonic Studio Deluxe meter, which is a relatively old model – the same model I used back in the 1970’s. I’m familiar with it, so that’s good, but I also like it because it doesn’t require batteries. It’s good for outdoor work, and studio work, where there’s plenty of light. It’s not so good for low light work, and that’s (in my opinion) it’s only negative. Otherwise, it works well for most of what I need.
There are basically 2 types of light metering we’re concerned with in photography or video work.
The first is called reflected light, and this is what your camera’s built in meter will measure. This type of metering measures the amount of light reflected by a subject. I’m not sure of the actual physics behind how this works, but when measuring this way, your camera or meter will always try to read the reflected light as if it were a medium grey in luminance. So, when measuring reflected light, you may need to adjust your exposure based upon the actual color or brightness of your subject – based upon what you want it to appear like in your photograph. So, if your subject is very bright, you may have to increase your exposure slightly, and if your subject is very dark or in a shadow that you want to reflect accurately in your photograph, you may have to decrease exposure slightly. Our modern cameras with matrix or evaluative metering do this for us, and they are getting better and better all the time. The camera’s computer can determine what type of scene your are photographing and adjust the meter accordingly to try to give you what you want.
The second type, and probably the more accurate type of metering is called incident light metering. This is where you actually measure the amount of light falling on your subject. However, in order to do this, you have to place the meter directly in front of your subject, and point to directly toward your camera. This has a couple obvious issues… first, and foremost, you might not be able to place your meter directly in front of your subject (if you’re photographing clouds surrounding the top of Mount Everest, for example). Thus the necessity, sometimes, to use reflective metering.
What I’d like to do is to shoot some photos with my digital camera, in full manual mode, using the settings from my trusty Sekonic Studio Deluxe meter. Then I’ll take the same photos with my camera in programmed auto (P) mode to see what the difference is.
Here’s the first of my test shots…
Manual Exposure 
Program Exposure

Manual Exposure 
Program Exposure

Manual Exposure 
Program Exposure
The first is probably the most subtle of the 3. The second is maybe the most obvious – with backlighting, the automatic mode I used tried to expose too much for the background which was brighter. Manual, incident metering, was much more accurate. Post processing could have helped brighten the foreground of the second image, but… what if you didn’t have the ability to post process? It’s always good to get the best in-camera exposure that you can, and post process if absolutely necessary (I know, it usually is necessary).
Here’s a few other shots – some with more backlighting. Let’s see how they look.

Manual Exposure 
Program Exposure

Manual Exposure (exposing for inside the door) 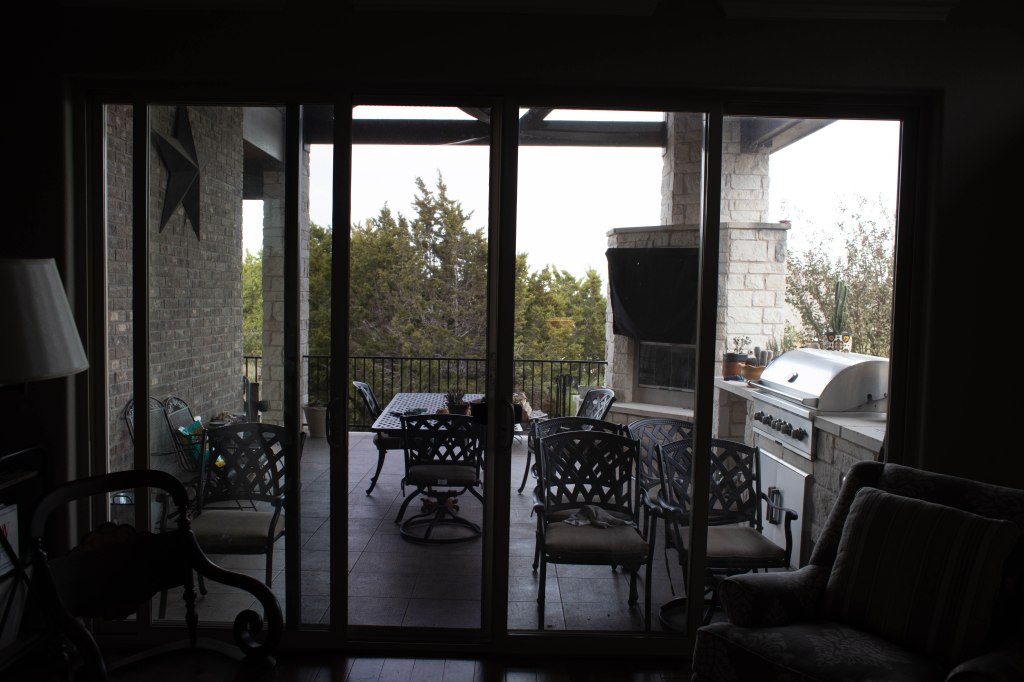
Program Exposure

Manual Exposure 
Program Exposure
I didn’t adjust exposure at all on any of these photos. The manual ones are shot at whatever settings my Sekonic meter said to use. The auto exposures have no exposure compensation. Now, you can adjust exposure to create the desired effect.
My take away from this little experiment is that the 2 types of subject that will be impacted most are very light (or very dark) subjects, and subjects with backlighting.
By the way, measuring incident light is the same as measuring light reflected from a grey card – maybe I’ll do a post on using a grey card someday…

You must be logged in to post a comment.