When I’m taking photos, I’m not always using a camera that has a built in light meter. My RB67 and Nikon S2 are a couple examples of cameras without meters – but I also use my Sekonic when I’m shooting with an Olympus OM-1, since I have one with a meter that doesn’t work. Older cameras (pre-1960) were mostly meter-less and required some kind of external meter to take light readings with.
In our digital, technology saturated world, there’s always apps on your phone to measure light with, and I’ve used one too (my favorite is LightMeter by David Quiles), but the Sekonic L-398A is my all-time favorite. I’m not sure if this is technically “Vintage” since it can be purchased new today, but mine is a little older, and I used one back in 1979, so it seems “Vintage” to me.
This meter has been around in various versions since the mid 70’s, and it’s still available new from Sekonic today! Even though it’s not perfect, there are a couple very good reasons that I love this meter.
First, the L-398 doesn’t require batteries – and there are some disadvantages of battery-less meters. However, the advantage to me is that I don’t need to worry about batteries (one less device to worry about) and it’s always ready to use whenever needed.
Next, this meter is pretty simple. As old as it is, it’s been basically the same since 1976 when it was first released. You can set an ISO value on the dial, then after metering, you move the dial so the arrow points to the exposure value identified by the meter needle. Then you will see appropriate f-stop and shutter speed combinations to choose from. Pretty much the same as any other analog meter out there.
Digital meters provide some other features, and also allow specialized metering, like flash metering, or spot metering. If you need those kinds of features, the L-398A is not for you. Those newer electronic meters will require batteries, and if you use it a lot, you will go through batteries. Rechargeables may be an option, but they don’t last as long as alkalines.
Given this information, where does the L-398A work best? Well, I use mine outdoors, in natural light. I also use it indoors, but it’s a little more difficult in low light. Since it’s battery-less, it requires light for power, so the darker it is, the more difficult it will be to use. Outdoors, or in a well-lit room or studio setting would be ideal. So, it is limited, but everything has some limitations.

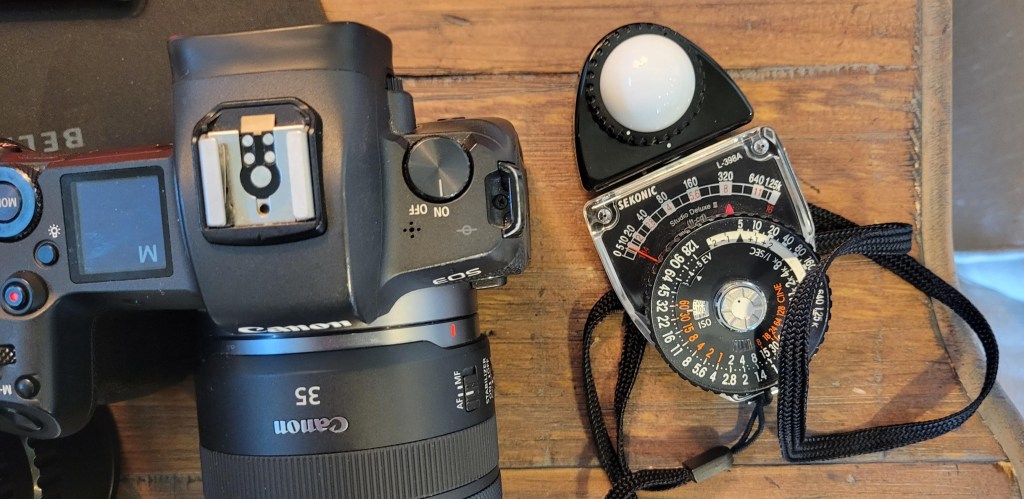
How would you use such a meter to check lighting, you might ask? Well, this meter (as do many other external light meters) provides 2 ways to measure light. First, and the way I prefer to measure is incident light measurement. Incident light is light falling on a subject, as opposed to light reflected off a subject (the way camera meters measure).

In the image above, notice how I’ve swiveled the head and white Lumisphere (the white half spherical cover over the sensor). The idea is to face it toward your camera – so as to measure light at the same angle your camera is with your subject. The Lumisphere actually is the right density/thickness so light measurement will be the same as measuring reflected light from a gray card. So, it won’t matter what colors or shades your subject is, your reading will always be accurate. Now, you still may want to adjust your exposure if you want to darken or lighten your subject, but if lighting is good, an accurate representation should not require any adjustment. I’m only mentioning this because you can always adjust your exposure to create varying results – but the point is, using the Lumisphere is equivalent to reflective metering off a gray card. After you place/aim the meter correctly, you press the center button, the needle moves to the correct position, and you release it to lock the needle on the measured value.
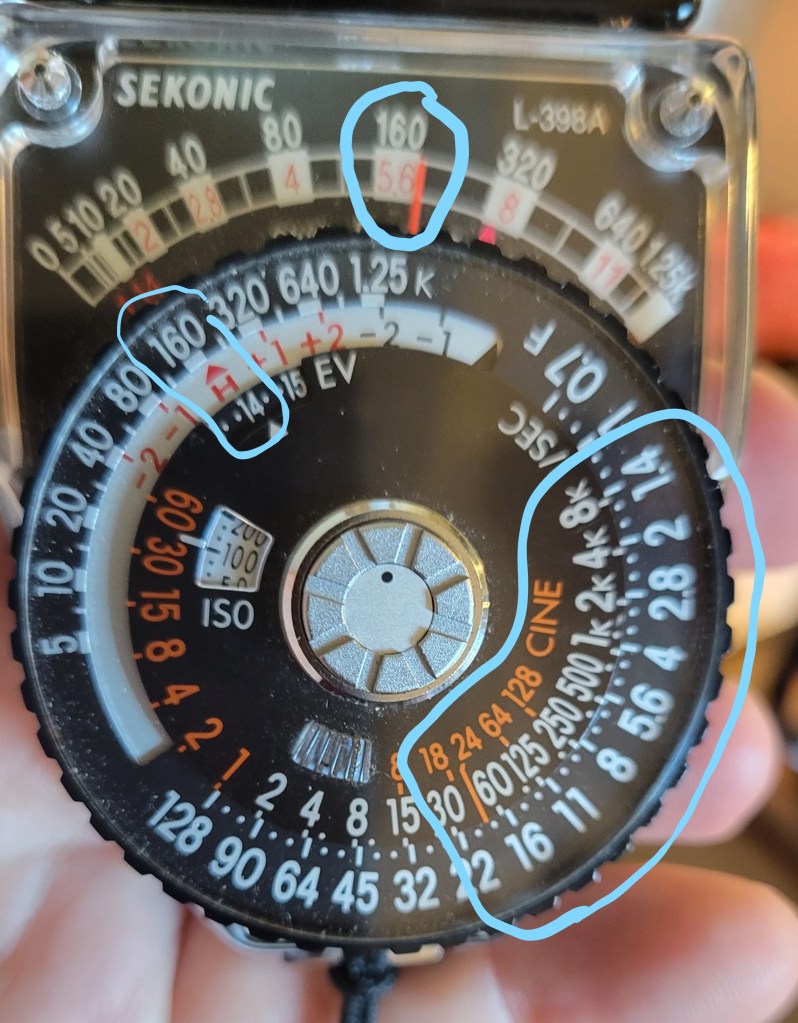
In the image above, you can see the outlined areas. First (at the top) you’ll see the needle pointing to 160 (or just past). I like to look at the white blocks under the exposure numbers (160 in this case) and you can see the needle is at the high end of the block under 160. Next, I move the dial so the red arrow points to the number the needle indicates – in this case I make the red arrow point to the high end of the white block under 160 on the dial. Now, I can choose any of the exposure combinations shown in the 3rd outlined area. So, f/11 at 1/125 of a second would work, as would f/5.6 at 1/500th of a second. That’s it – pretty easy.
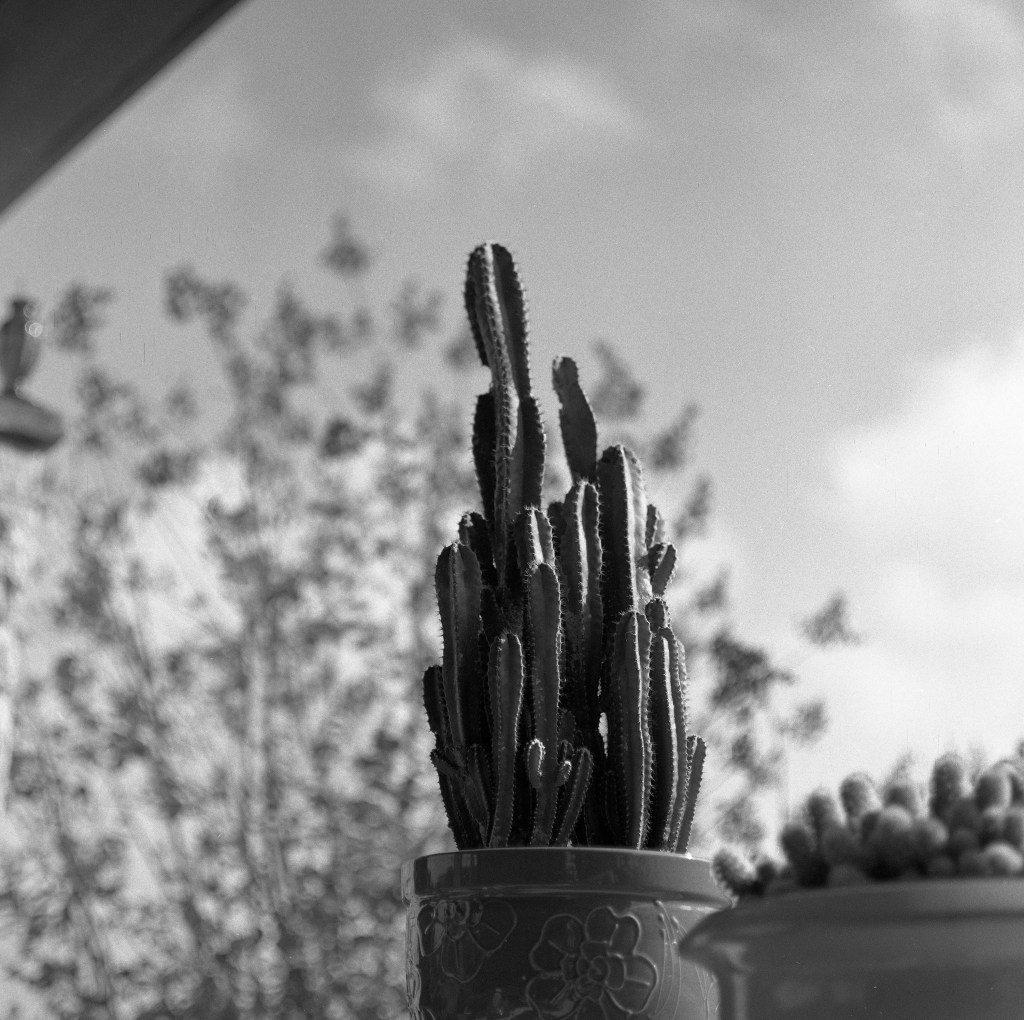
The photo above is the result of metering and using the settings from the example. It’s taken with my Bronica EC-TL II and 50mm lens, on Ilford FP4 and processed in Rodinal (1:50).
As you can imagine, this kind of metering may not be ideal for distant subjects, like mountain ranges or other distant landscapes. Some ideal uses for this kind of metering would be portraits, or a still life. I think you can see what I mean. Incident metering works best if you can place the meter directly in front of your subject, aimed in the direction of your camera, so you’re measuring light just as it hits your subject. Using the reflective metering attachment (Limigrid) will work for some distant subjects, but for more accurate distant light measurements, a spot meter is required so you can pick and choose specific parts of the landscape to meter and determine the correct settings – which is a bit more complex. So those are a couple types of photographic situations where this meter may not be the best choice.
Now, back to a couple minor points. The red arrow. Why does it have an “H” under it? Well, since this meter is battery-less, and relies on light for power, the range of exposure values is too large to go from bright sun to low indoor light on the same scale. To compensate for this, there’s a small “HIGH slide” that’s stored in the back of the meter.

This HIGH slide is removed and slid into the slot on top of the meter head when metering in bright light (see the next 2 images).


I’m showing it tilted in the slot just so you can see where it goes, but if you straighten it out, it will slide in properly. Once inserted, you would use the “H” arrow on the dial to match with your exposure value. If it’s not inserted (when in a lower light situation, for example), there’s an arrow without an “H” (you can see it in the very first photo of the meter at the top) that you would use. This is really the only complex part of using this meter that you have to remember. Everything else is quite standard.
Now, the second item I should mention is that you would use the half round cover (Lumisphere) to measure light falling on a 3-D subject. There also a flat white disc (Lumidisc) to use if you are photographing a 2-D subject (like a painting in an art gallery). This will give you a proper reading for light falling on a flat surface instead of a 3-D surface. Slight difference, but it will make your measurement a bit more accurate.
Now, if you wanted to measure reflected light, there is a cover that is a black disc with holes in it – called a Lumigrid. This will allow you to point the sensor at a subject and measure reflected light and would work just like the meter built into cameras. You would necessarily need to adjust the reading for zones or use an average reading for average scenes – or you could measure light reflected from a gray card (which should provide the same reading as an incident measurement using the Lumisphere or Lumidisc).
If you buy one of these meters used, make sure it comes with 2 discs, one Lumisphere and the high slide. Some used units I’ve seen don’t have all accessories.
Both types of measurement (incident or reflected) can be useful, and in some cases, you may not be able to use one or the other. I prefer to take incident readings, and I think they are generally more accurate, and are especially useful in a studio setting.
I find having an external meter available can be quite useful, and I prefer this Sekonic L-398A to the meter apps for the phone. I can carry this with me when I’m hiking or walking around the city pretty easily without worry that the battery might be dead when I need it.
The other nice thing about the L-398A is that it’s readily available used for under $200. The older versions (L-398 and L-398M) are also available for under $100, but the original units used a Selenium cell and the L-398A switched to a newer Amorphous Photocell since the Selenium cells tend to lose accuracy over time (so they say). I have an older model that still seems accurate, but if you buy one used, I’d try to get the L-398A to assure you have many years of accurate use ahead of you.
Well, that’s some of my thoughts about my favorite light meter. There are many out there, but I hope this helps you to understand a little more about the Sekonic L-398A.
I hope you all enjoy a wonderful Christmas this year! Stay safe, healthy and I hope you can finish this year by photographing something interesting!

You must be logged in to post a comment.