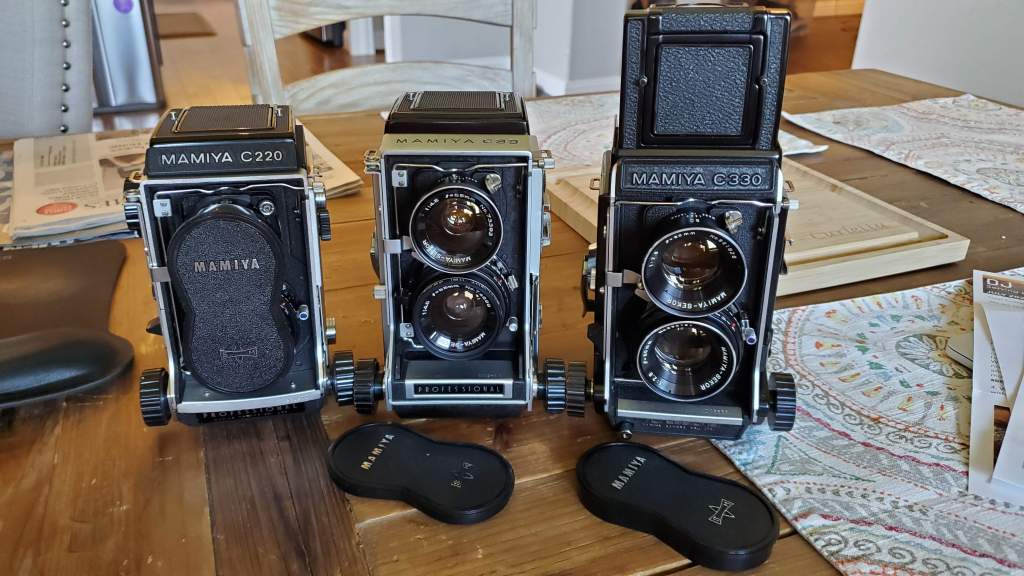
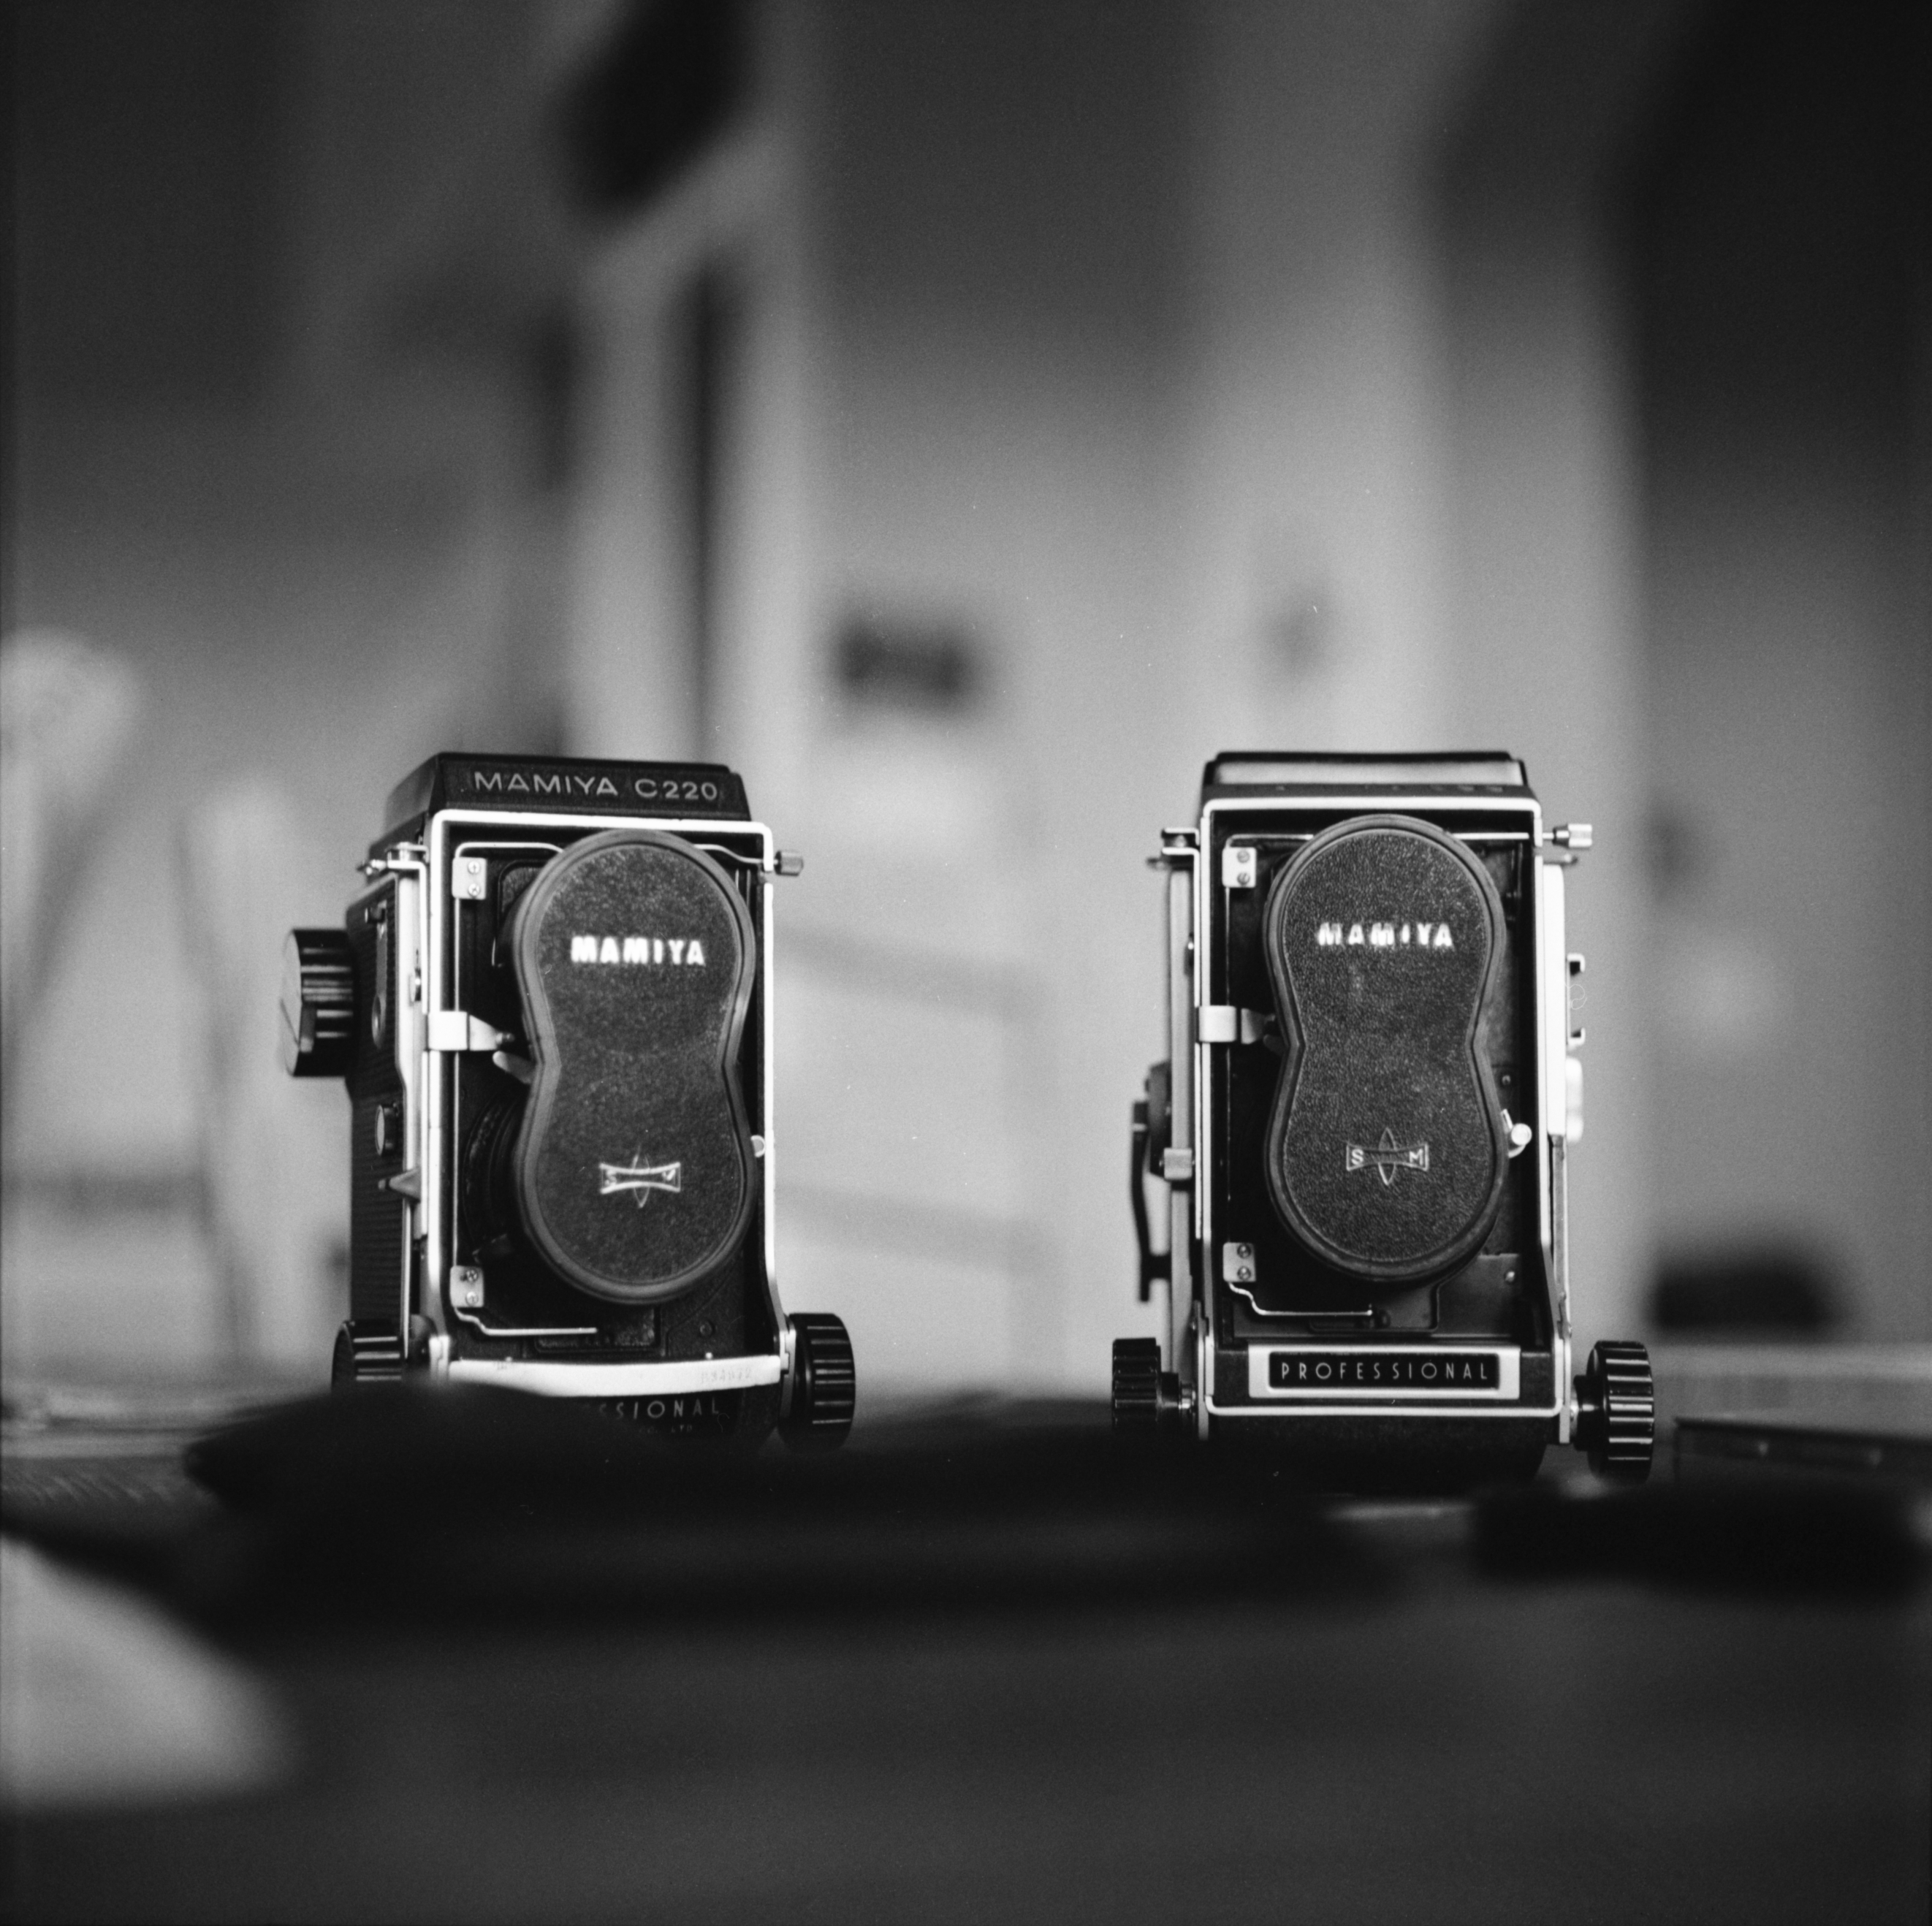
Recently I’ve been interested in medium format photography (again). My post last week talked about a couple new (to me) medium format cameras by Mamiya – the C33 and the C220. Today, I’m going to be discussing the C330 – a slightly newer version of the C33, but the same basic camera. The C330 is lighter, and easier to carry than the C33. The C220 is supposed to be a bit lighter – but honestly, the C330 feels about the same to me.
I’ve been thinking about the “process” I need to go through with these older cameras in order to capture an image. It’s a lot of work! So, why would I (or anyone) go through all this trouble when I could just use my phone and snap a full color, high resolution image, and be all done in a matter of seconds? To some people, it might not make any sense to do what I do with these old cameras. But, to me, the process (if only for it’s therapeutic benefits) used with these older cameras is worth exploring.
For film, I generally choose either a 35mm camera, or a 120, medium format camera. Today I’d like to talk about one such medium format camera, and how it helps me to create.
A medium format camera is usually fairly heavy, and not easy to carry, compared to a 35mm. It’s really best used with a tripod (although I hate using a tripod), and it’s hard to focus. So, why would I used it? Well, first of all, people captured many beautiful images with cameras just like the C330, or cameras that were even harder to carry and use. In my mind, capturing an image, or making a photograph, should never be too easy. It should be intentional, thoughtful and purely about the image. It should take work.
The fact is, you don’t need a modern camera to capture beautiful, well exposed, and nicely composed images. You don’t need electronics, or auto focus, or matrix metering. You do, though, need to understand your tool, and its strengths and its weaknesses. You need to know your tool so well, that you don’t really need to think much to capture your image – all your thinking should be focused on creating, on composing – you should not be distracted by the technology.
Unfortunately, one stated goal of technology has been to free us up to do just what I’m suggesting – focus on our image, and not on the camera. Whether technology succeeds or fails at that, I’m not really sure – but for me, eliminating technology altogether seems to free my mind to focus on the basics of color and composition – to focus more on the subject and the image itself, instead of the camera being the most important piece of this image making puzzle.
This brings up another topic – why I choose to shoot film. There are several, very good, lower tech, digital cameras I could choose to shoot with (and I do sometimes). You can even treat your digital camera as if it were completely manual, if you so choose (see my post about Time Travel with your Digital Camera). Film is a very interesting medium for photography. Film is different from digital in many ways. Producing an image with a multi step, chemical process seems more organic. It’s more “real”. Our digital technology isn’t real, it’s all virtual – in other words, without electricity there would be no image, nothing. With film, the image is produced naturally by light on the surface of the film. Chemicals are used to transform (through chemical reaction) the silver on the film. The chemicals act differently on the parts of the emulsion that have been exposed to light than they do on unexposed parts. The chemicals cause the image formed on the emulsion to be permanent, so they no longer can be changed by light. This is different from digital, it seems more natural.
We all live in this digital world, and I am as embedded in technology as anyone – I work in a technology field, so I have to immerse myself in technology. I also try to remind, to warn people, everything we store digitally is not permanent, and it could be gone instantly. I don’t want to be an alarmist, but that’s reality. Before we had cloud storage and saved all our important data in the cloud, if your computer died (which I’ve experienced more than once) you would lose everything. I backed up important data (to floppy disks, tapes or hard drives), but that is never 100% safe. What would happen to our data if we woke up one day, and the internet was gone? Our digital cameras have dual card slots, and can instantly transfer our photos to our phone, or the cloud, or a production engineer’s computer. We can’t rely 100% on our SD cards. An SD card can go bad, or be defective, or just fail when transferring photos to your computer. This is just the way it is. Thankfully, it doesn’t happen much.
Much can go wrong with film as well. Film can be loaded incorrectly in a camera or a developing tank. Film can be accidentally exposed to light, destroying an entire roll. You could take wedding photos, and have your shutter speed set wrong when using a flash, and the entire roll (or rolls) of film might display only half an image. Or, you might take several photos, and realize you had no film in the camera at all… not that I would ever do any of these things, but they could, theoretically, happen.
The point is, I suppose, that although nothing is perfect, removing technology seems to help me focus more on the basics of what I’m doing. The result is a tangible, physical negative (or positive). And, if you haven’t noticed, technology seems to clutter up our lives a little.
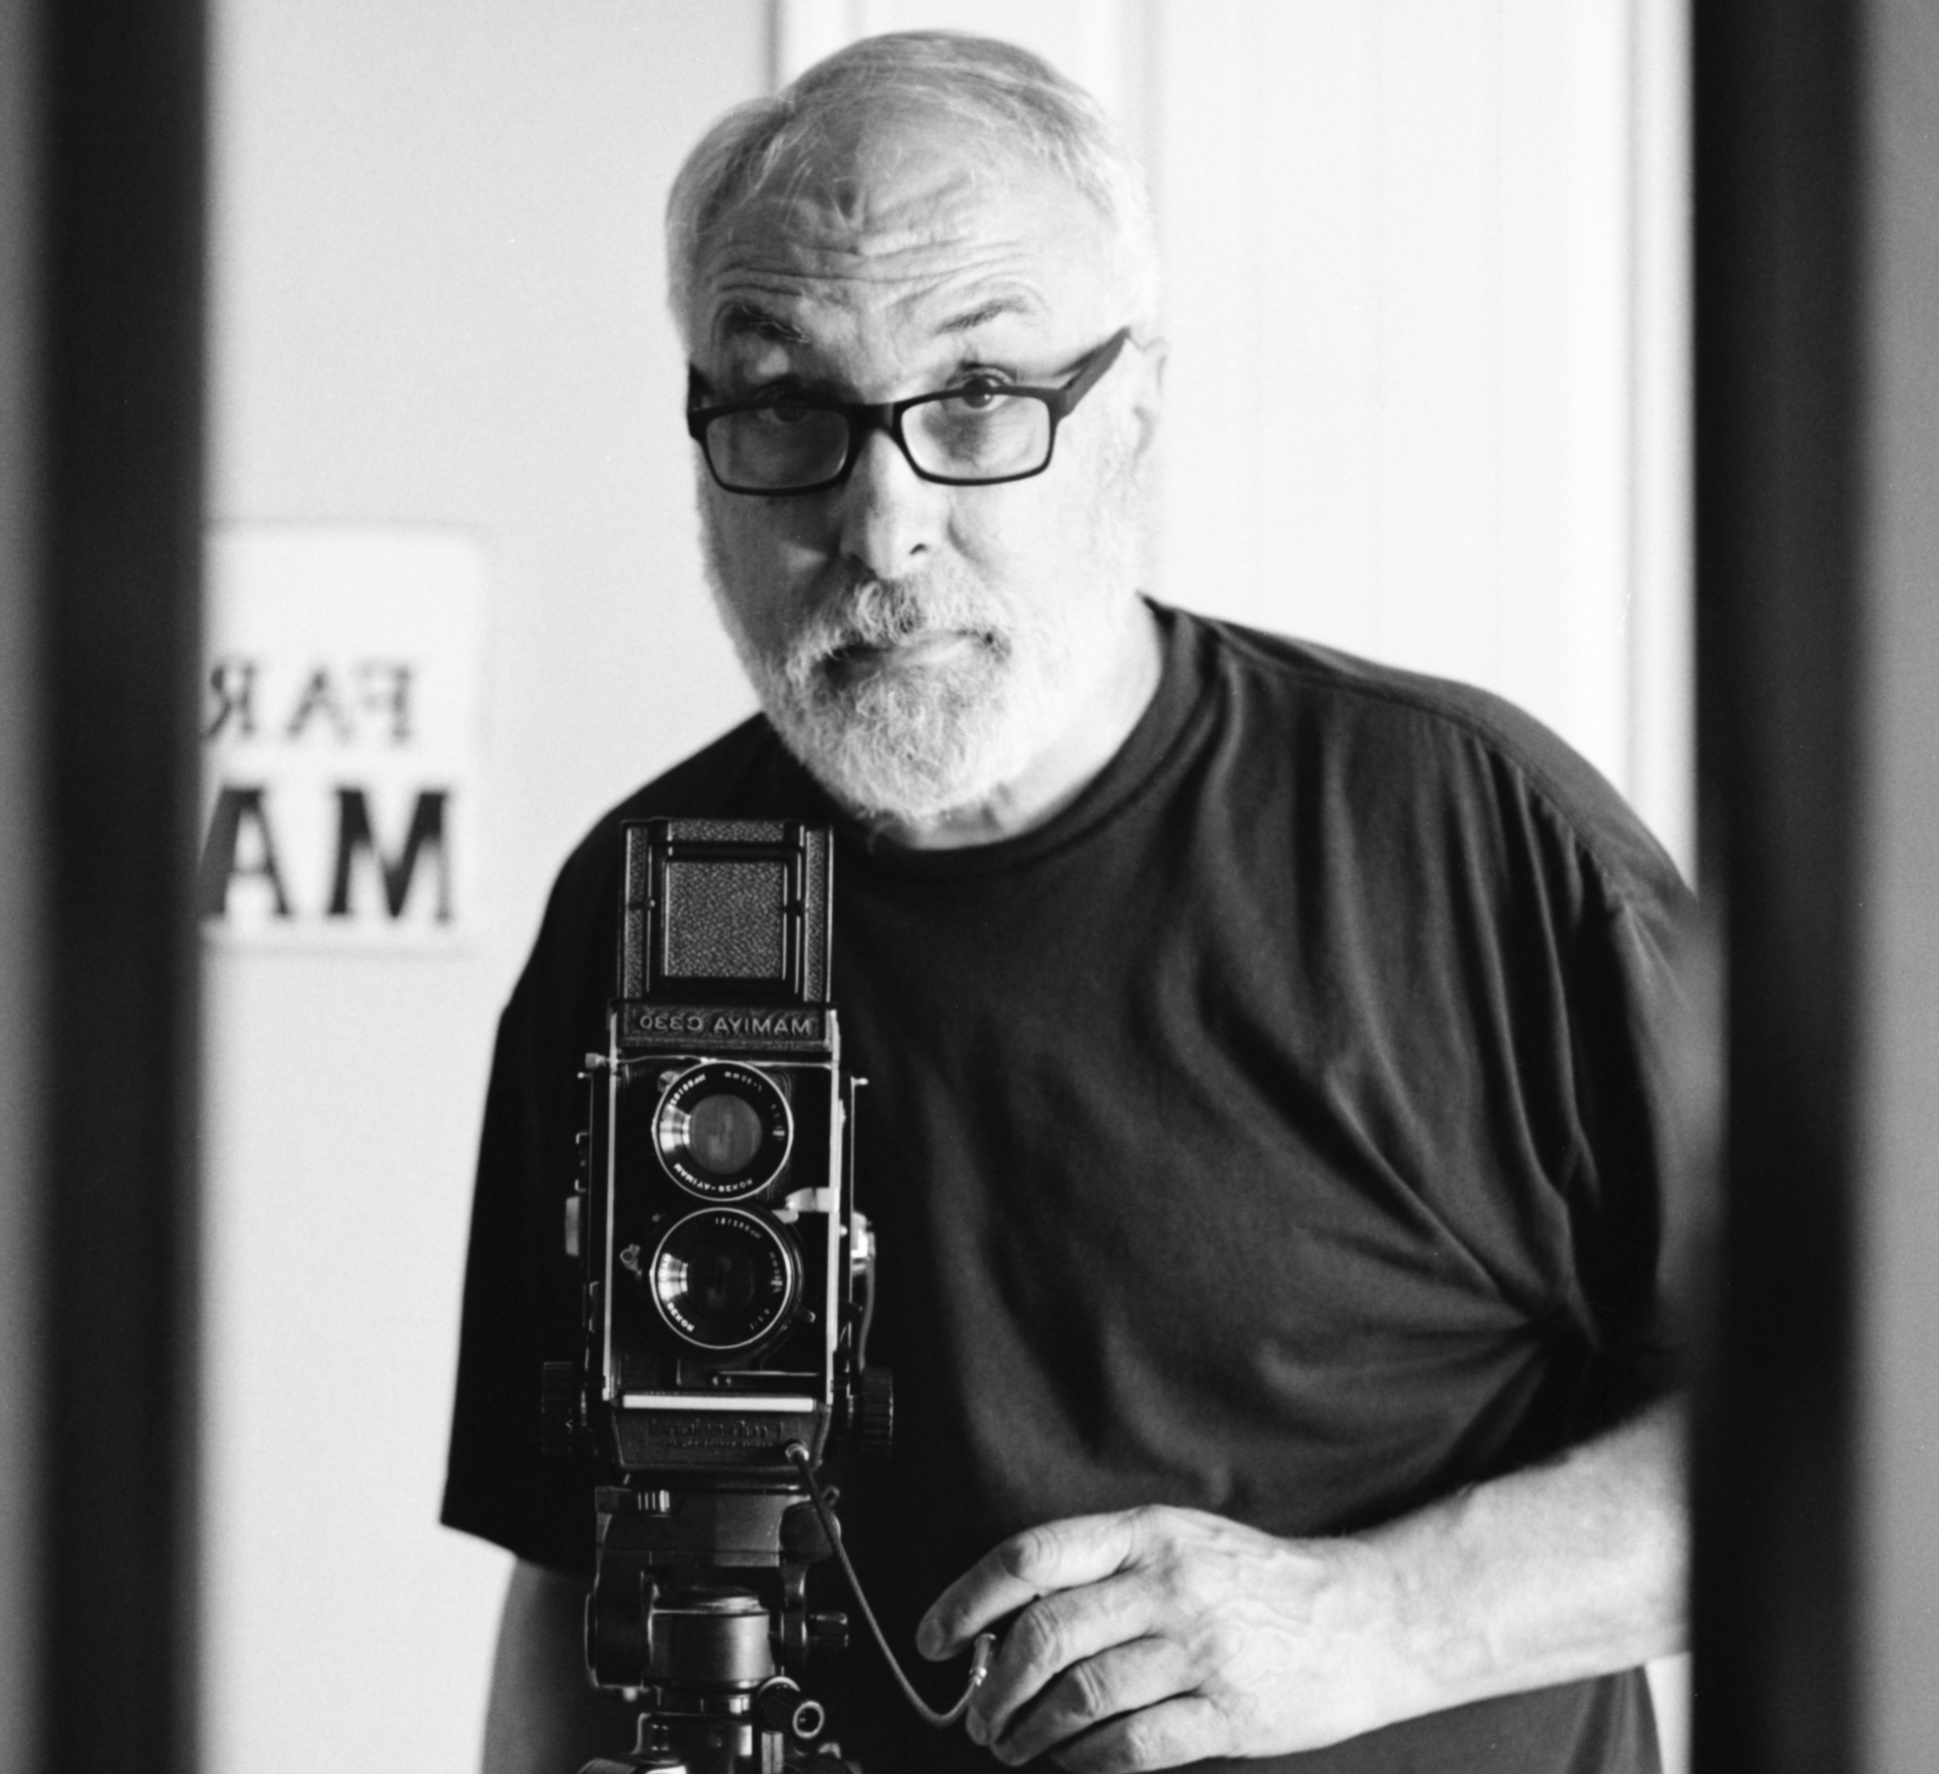
Ok, enough of that… back to my Mamiya C330. Let me describe what it’s like to use this camera. The C330 functions a bit more smoothly than it’s predecessor, the C33. The film advance on the C330 is better calibrated to require just one complete turn, and the crank folds precisely where it’s supposed to. The C33 required you to reverse the crank a bit, and then fold it into the recessed hole in the case before taking a shot. It’s really difficult to explain why this was needed on the C33, but this is corrected on the C330 which needs one complete turn of the crank to advance the film – then it folds out of the way perfectly.
The 80mm f/2.8 lens causes the viewfinder to be a bit brighter than the other lenses – if you’re using an f/3.5 or f/4.5 lens, it’s a bit more difficult to focus. I like using the standard waist level finder. It’s simpler, and a bit “old school”, but sufficient for viewing and composing a shot. I think part of my fascination with older technology is that I like to experience, at least a little bit, what photographers from the past had to go through to create photographs.
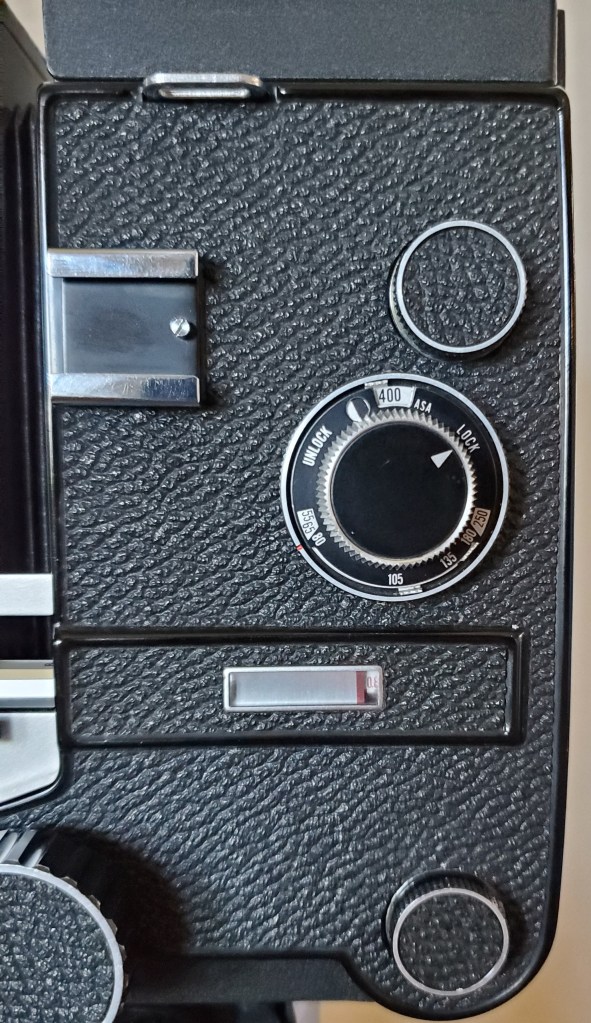
The C330 has a dial on the left side where you can specify an ASA/ISO. I don’t think this has any connection to the viewfinder (there is a finder available with a meter). I think it’s merely for reference – so you can remember what speed film you’re using. On the same dial, you also have the option to specify the lens you are using (55/65/80, 105, 135, 180/250). I believe the purpose of this is to allow the camera to display accurate parallax adjustment in the viewfinder for close focusing. To help you adjust your composition, a line comes down from the top of the viewfinder, the closer you focus, the farther the line moves down – presumably showing you where the top of the frame will be – compensating for the distance between the upper and lower lens.
Now, keep in mind, these features (ASA/ISO dial, parallax compensation) are only helpers – you can ignore them if you choose. If you ignore the parallax warning/adjustment for close focusing, your image will not be composed as you think, but you can still take the photo.
The C330 does have double exposure prevention, as well as multiple exposure capability if you choose to enable it. There is a small dial on the right side, just in front of the film advance crank.

If you set it to “Multi” you can also snap the shutter when no film is in the camera.
One feature on the C330 I like, that the C33 didn’t have, is a shutter release on the bottom, right side of the front of the camera body. You can see the normal black plastic shutter release in the image above, which can be easily pressed by the thumb of your right hand while holding the camera. The front shutter release (long silver button) can be easily reached by your right index finger while holding the camera. I like that option. This front shutter release is also where you screw in the cable release, if you choose to use one.
On the left side of the camera (on the same dial that I mentioned before, where you can set your ASA/ISO) there is a “Lock/Unlock” dial. This is an interesting feature – which allows for closing off the film box so the lens can be changed with film in the camera. It also controls the lock on the lens retaining bar – so, when it’s locked, the lens cannot be removed. When it’s unlocked, a wall moves up inside the camera (between the film and the lens, effectively forming a light-tight covering for the film) and, simultaneously, the lock is removed from the lens retaining bar. Then the lens may be removed. Remember, the shutter on these cameras is in the lens. So removing the lens without this feature would result in light shining directly on your film.
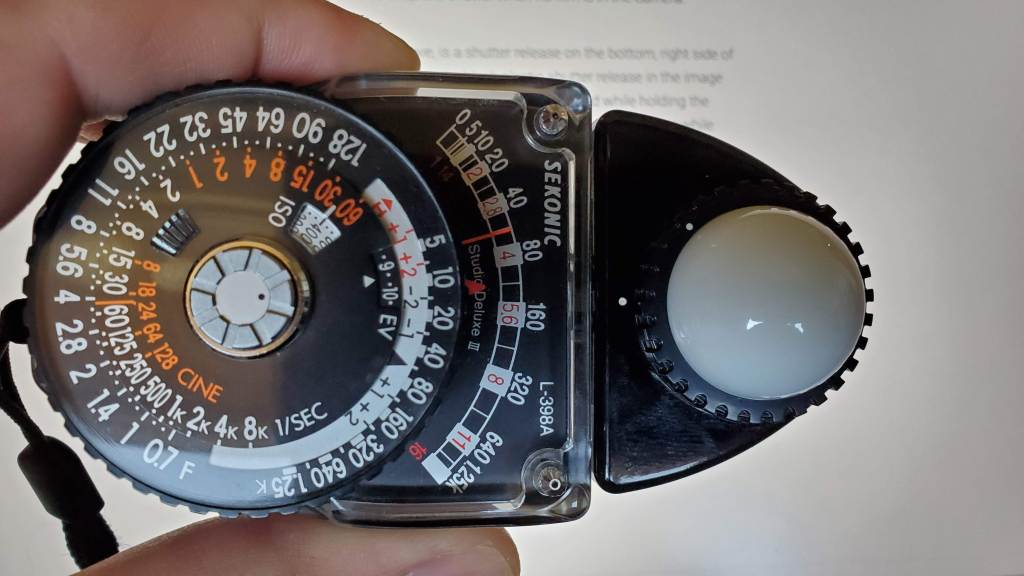
When I’m using the C330, I always check lighting and set the exposure first. For checking light, I use my Sekonic Studio Deluxe. This meter isn’t as sensitive in low light because it’s solar powered, and doesn’t require a battery. That’s very convenient for me – and since I’m generally not using these cameras at night, or under other very low light conditions, the Studio Deluxe works well. You can see, in the image below, it’s not too complex, and pretty easy to read and use. One of the main reasons I continue to use my Studio Deluxe is because that’s what I used in college, and I’m very comfortable using it.
Once I have a measurement, I set the shutter speed and f-stop before composing, focusing, and taking my photograph.
Keep in mind, all that I’m going through, starting by measuring the available light, are normal steps, a normal part of the thought-process that leads up to creating a photograph. As you are measuring light, you are also observing your subject.
The next step would actually involve looking through the viewfinder at the subject. You should have observed, as you measured the light, the effect light had on your subject, and you should have been thinking already of where you might stand, or position yourself, to capture the best representation of your subject – the image you already have in your mind.
Adjusting settings manually allows for a slower, more methodical, and thoughtful photographic experience. You could do the same thing with an all automatic, digital camera, but you don’t have to. With the C330, you have to slow down, there’s no other way.
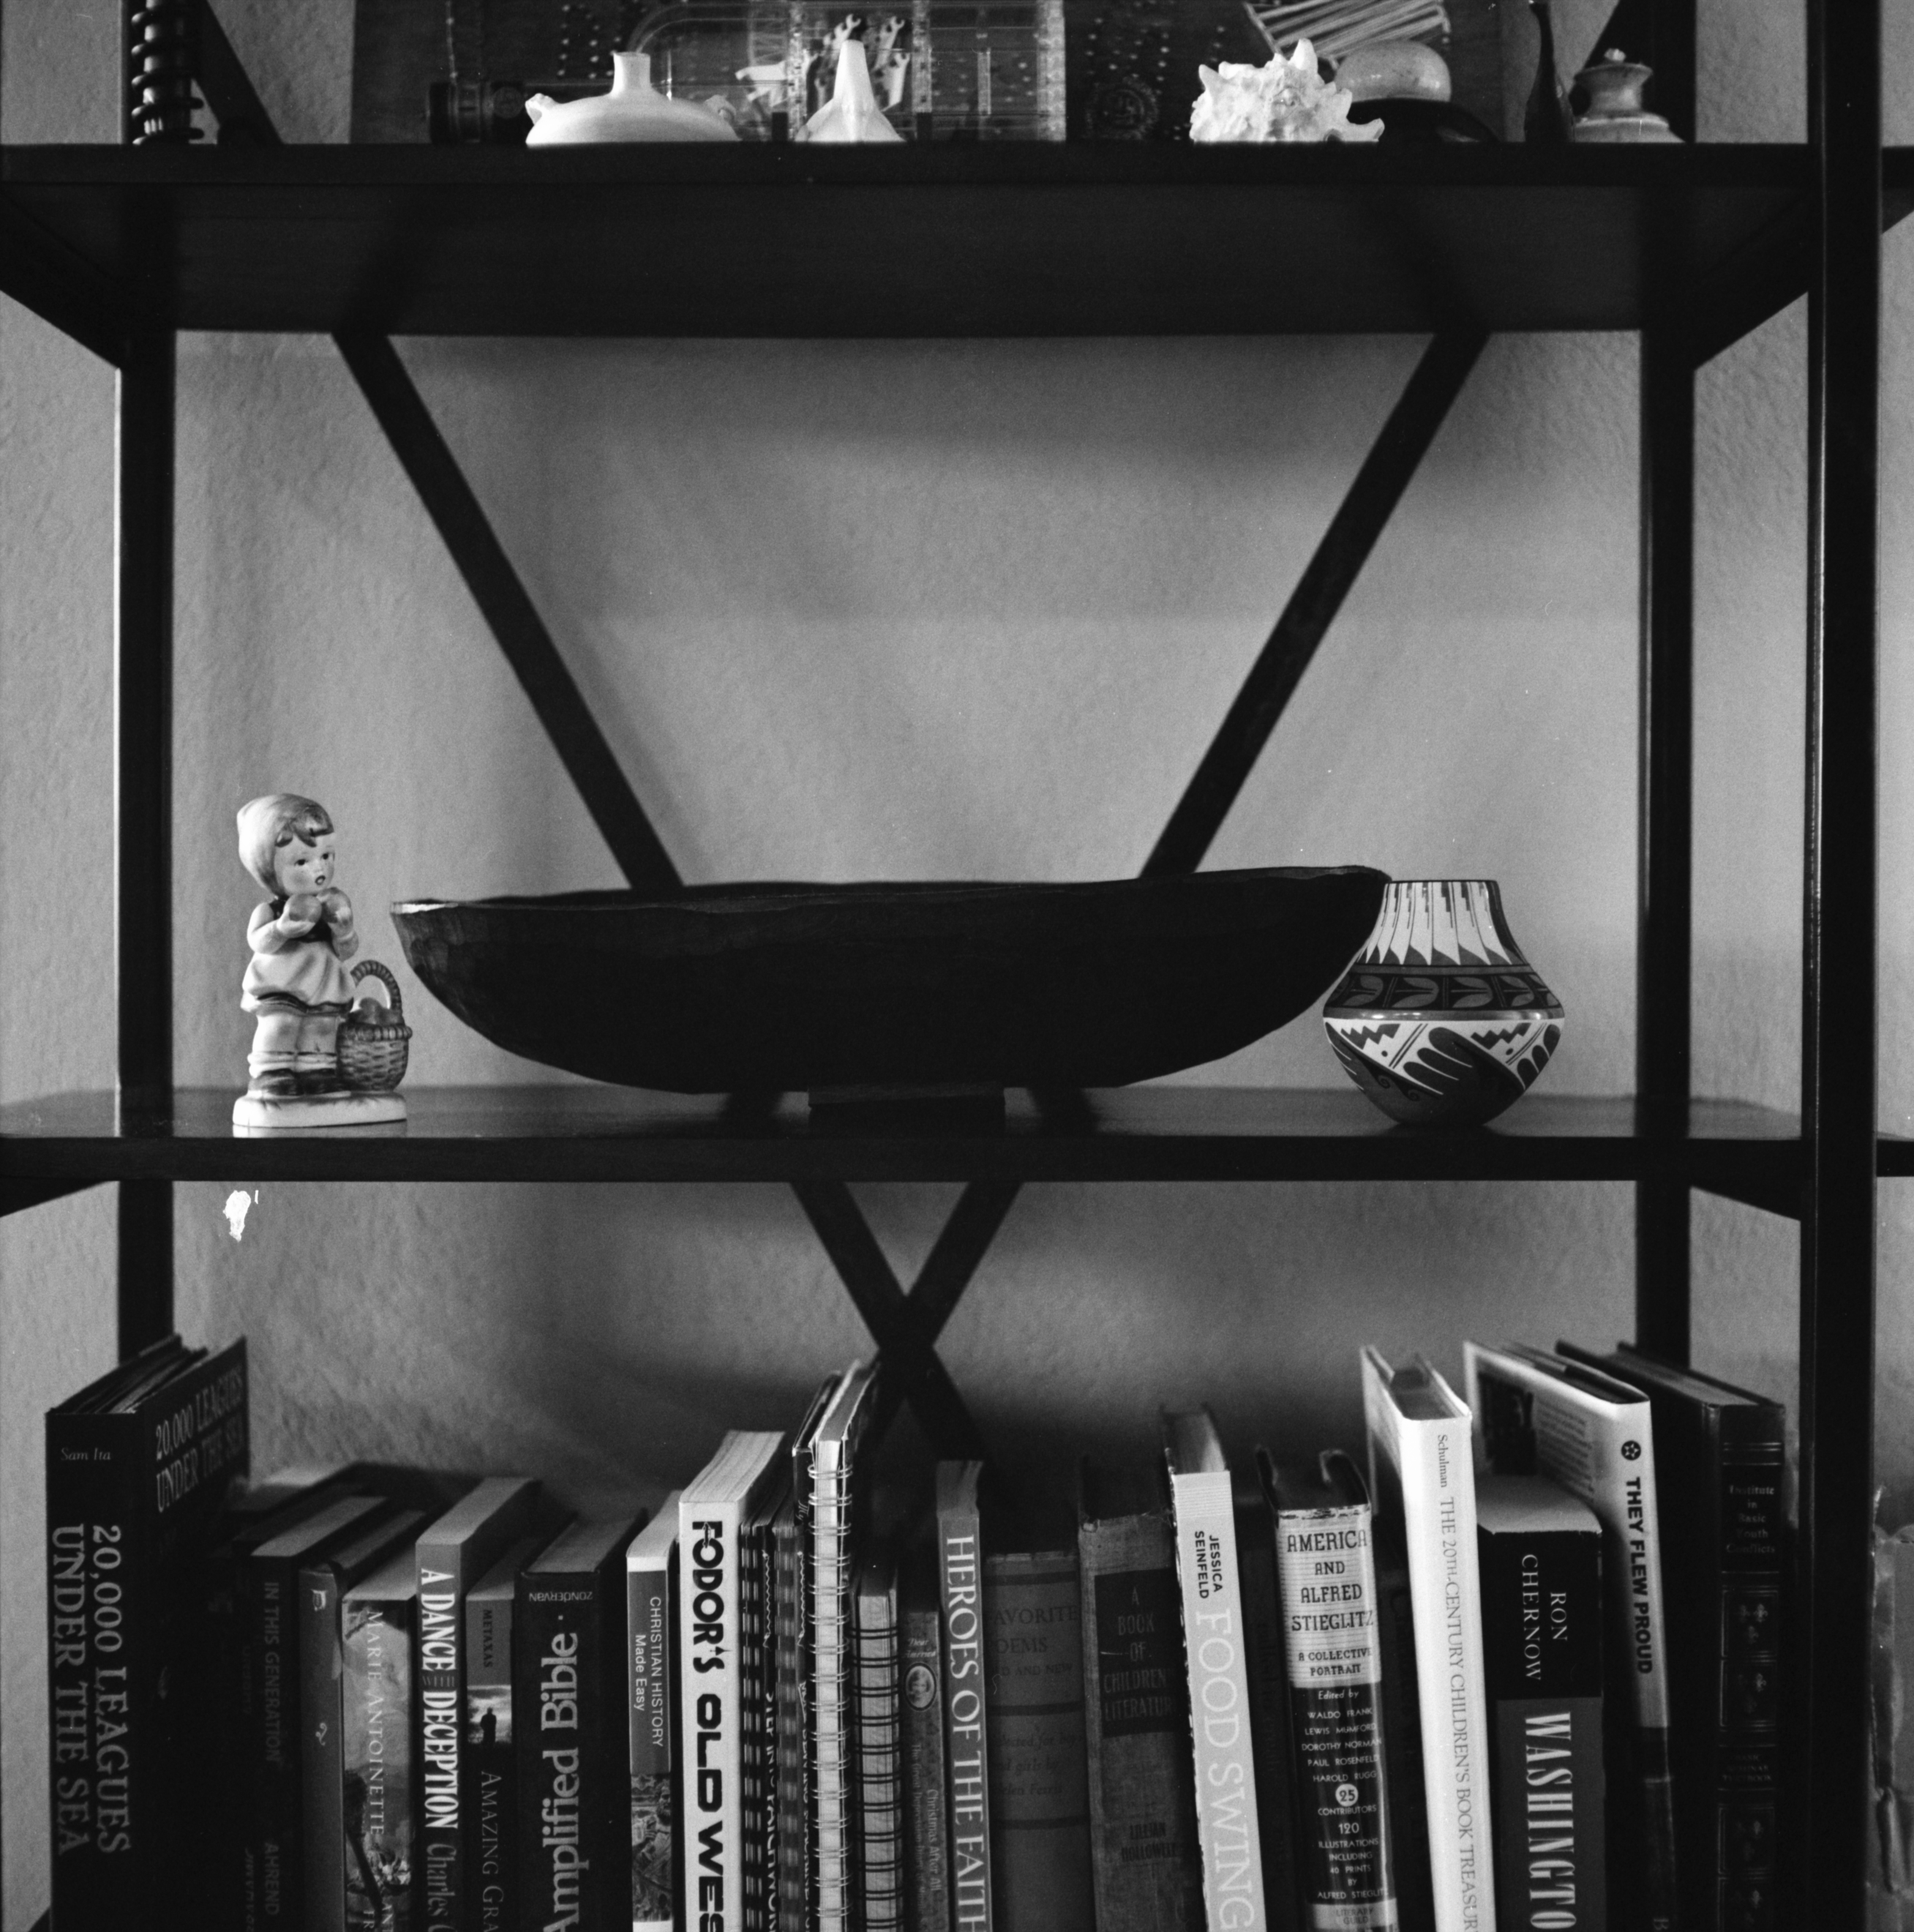
Now, let’s take a look at some shots I was able to capture, to make, with this camera. When considering the angle I might shoot from, I appreciate the waste level finder. In fact, with my digital cameras, I like using the fold out viewing screen to simulate waste level viewing. If you want to get low, using an eye level finder can be problematic.

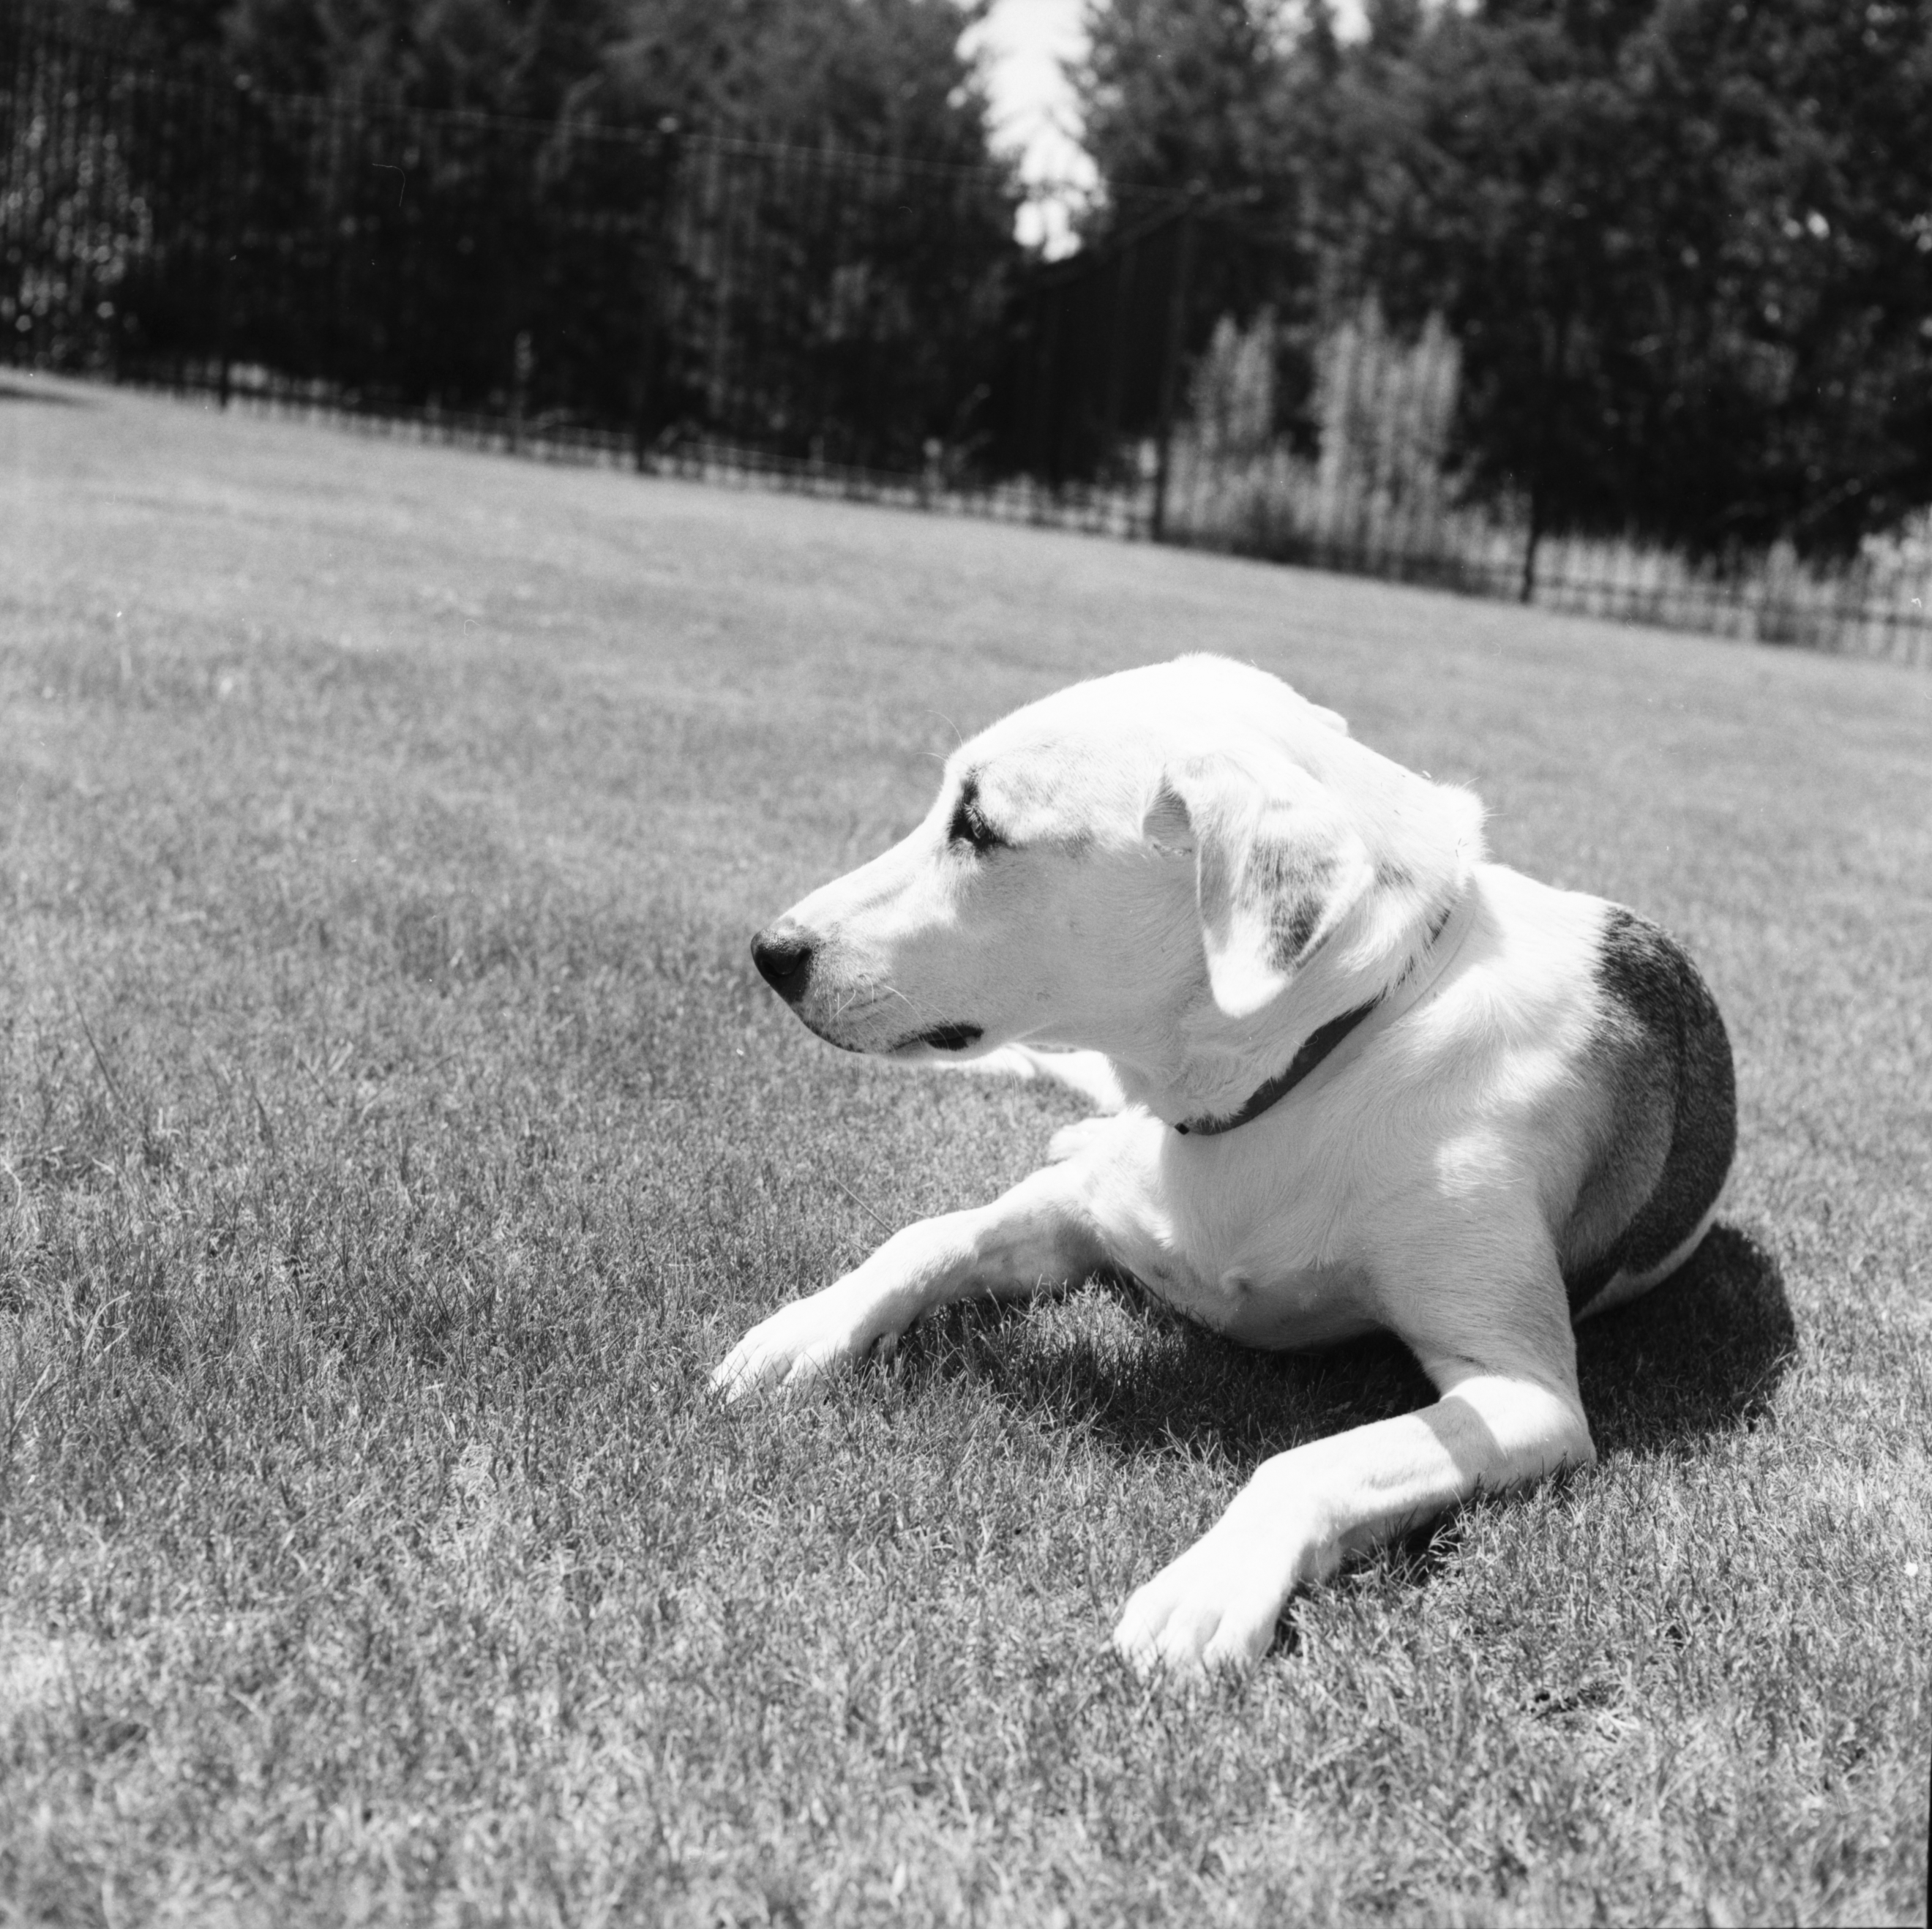
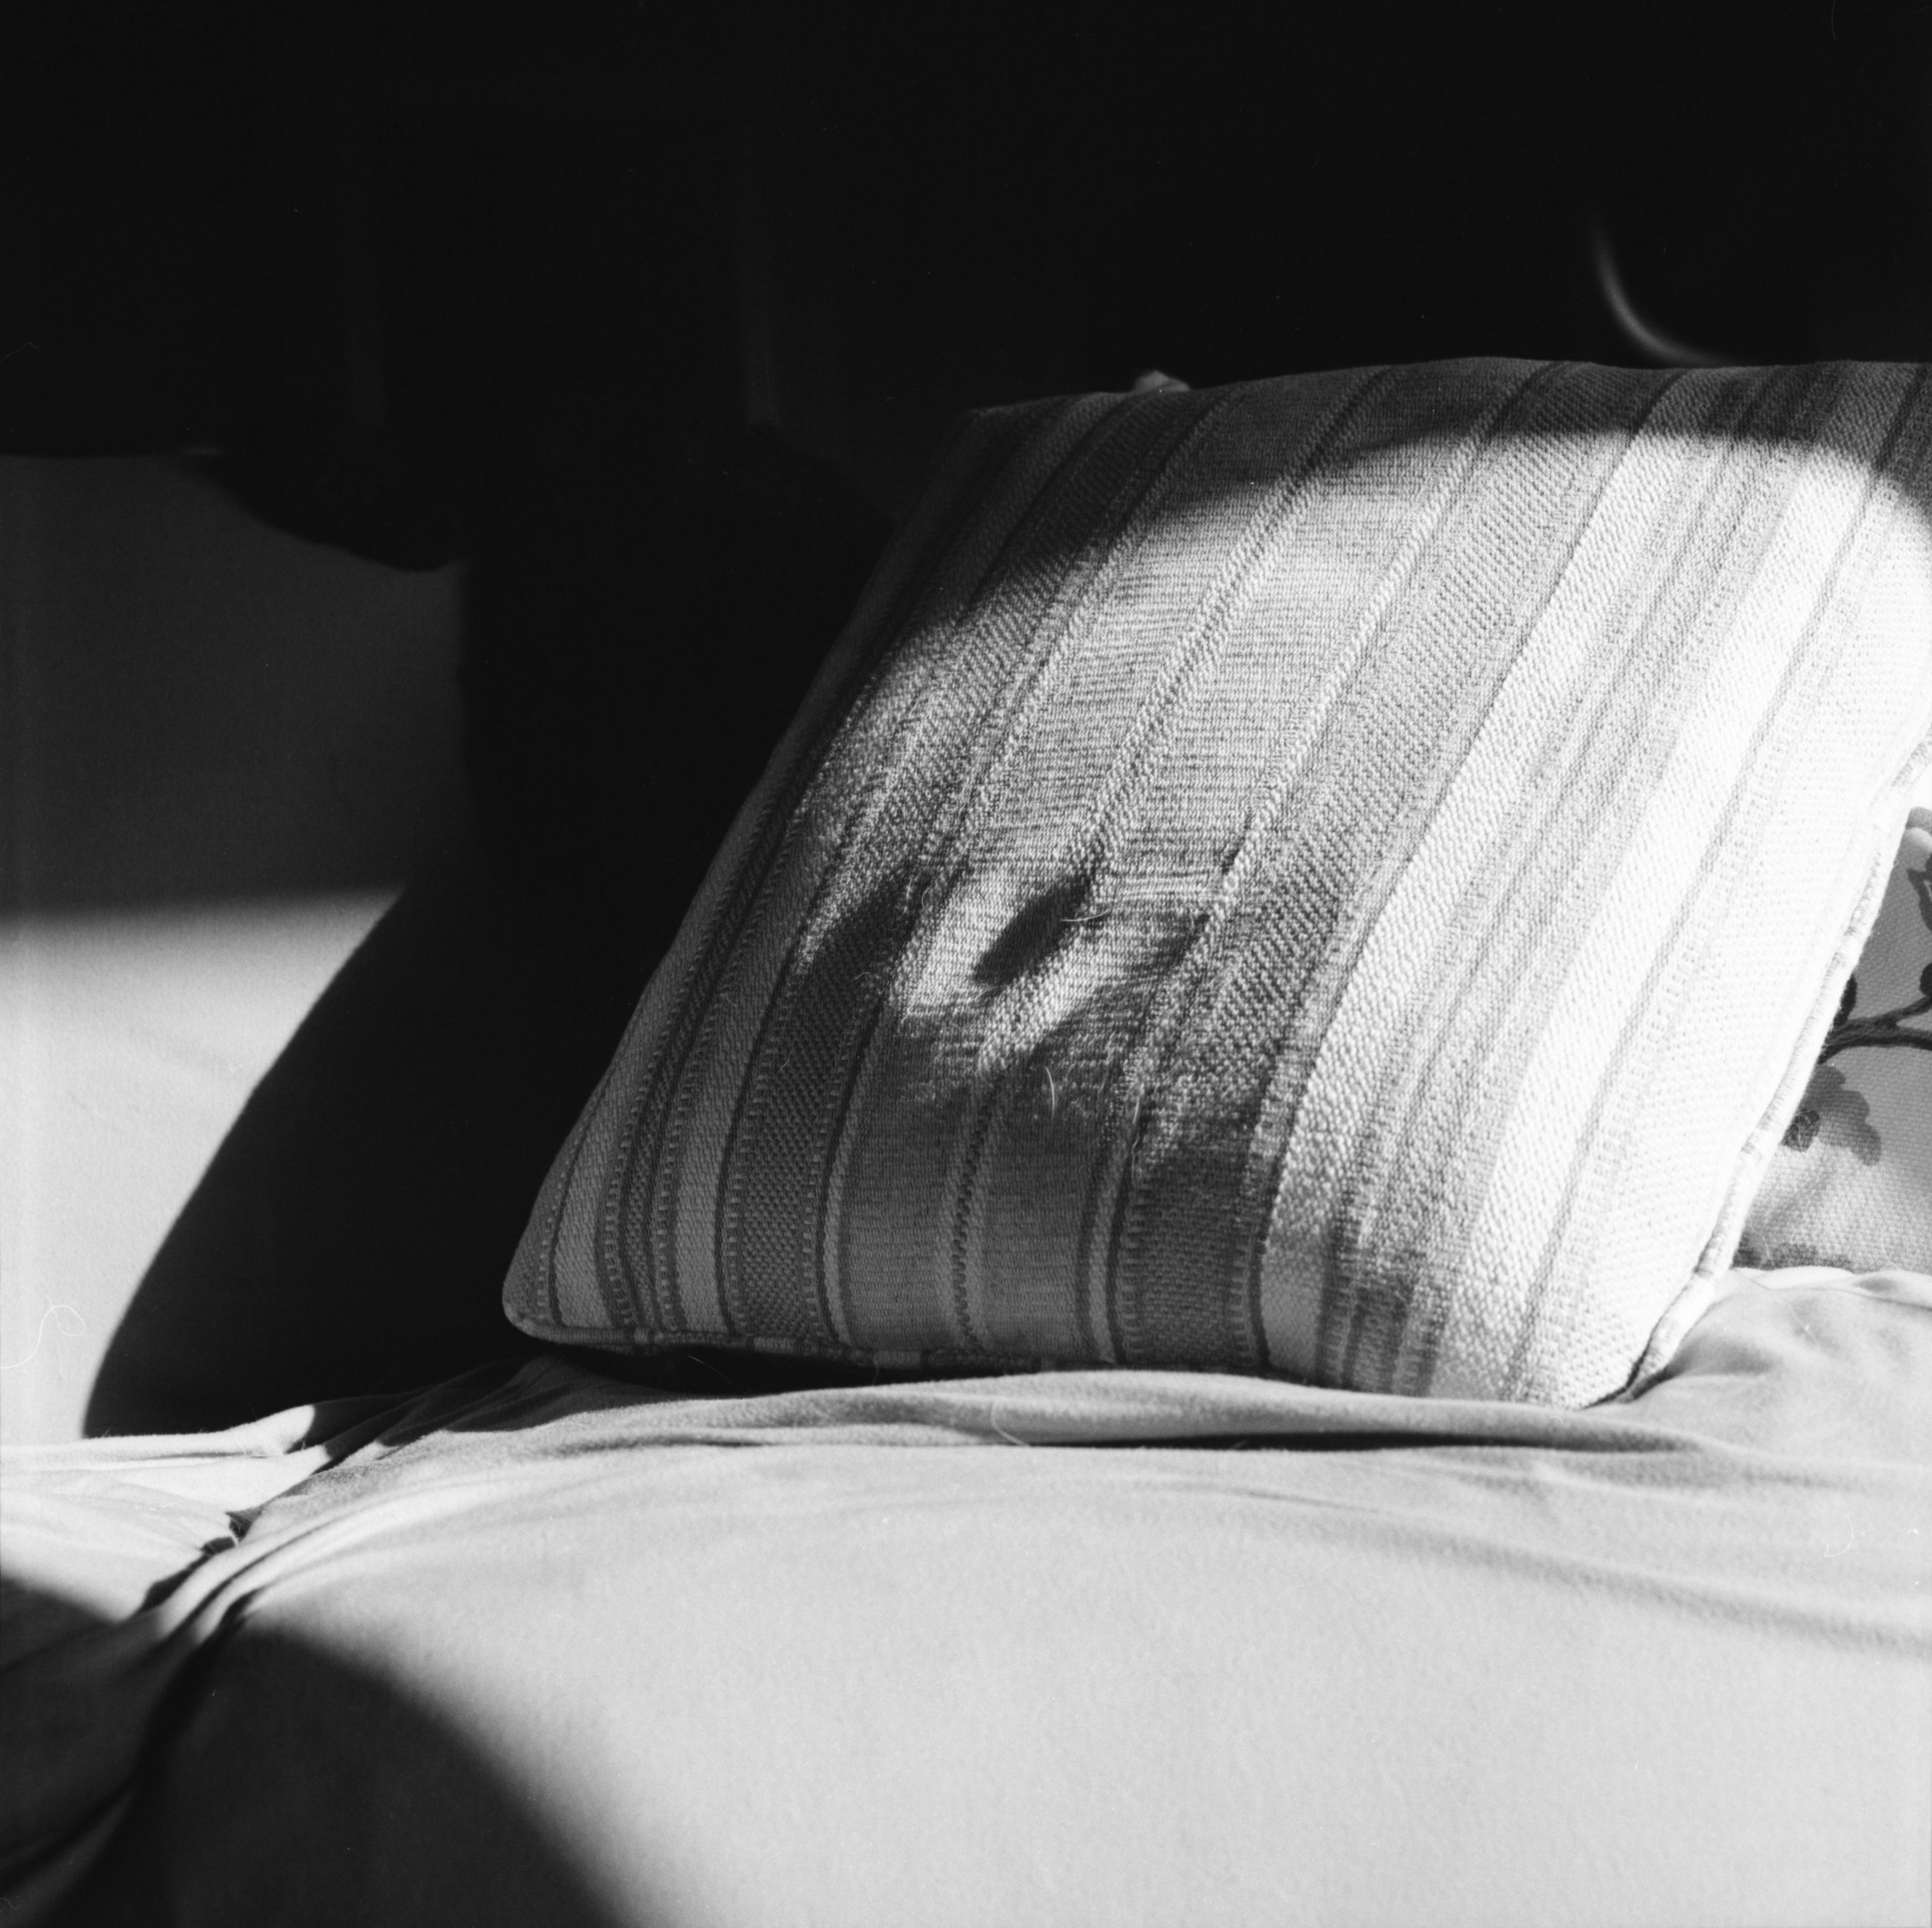
My first couple shots. I love the bokeh, and how the blurred background enhances the image. With an 80mm lens, the bokeh is quite nice. Choosing a smaller f-stop allows for some background, or you can choose a larger f-stop to blur the background significantly. These two images are on FP4 at ISO 125.


The images above are on Tri-X shot at ISO 400.
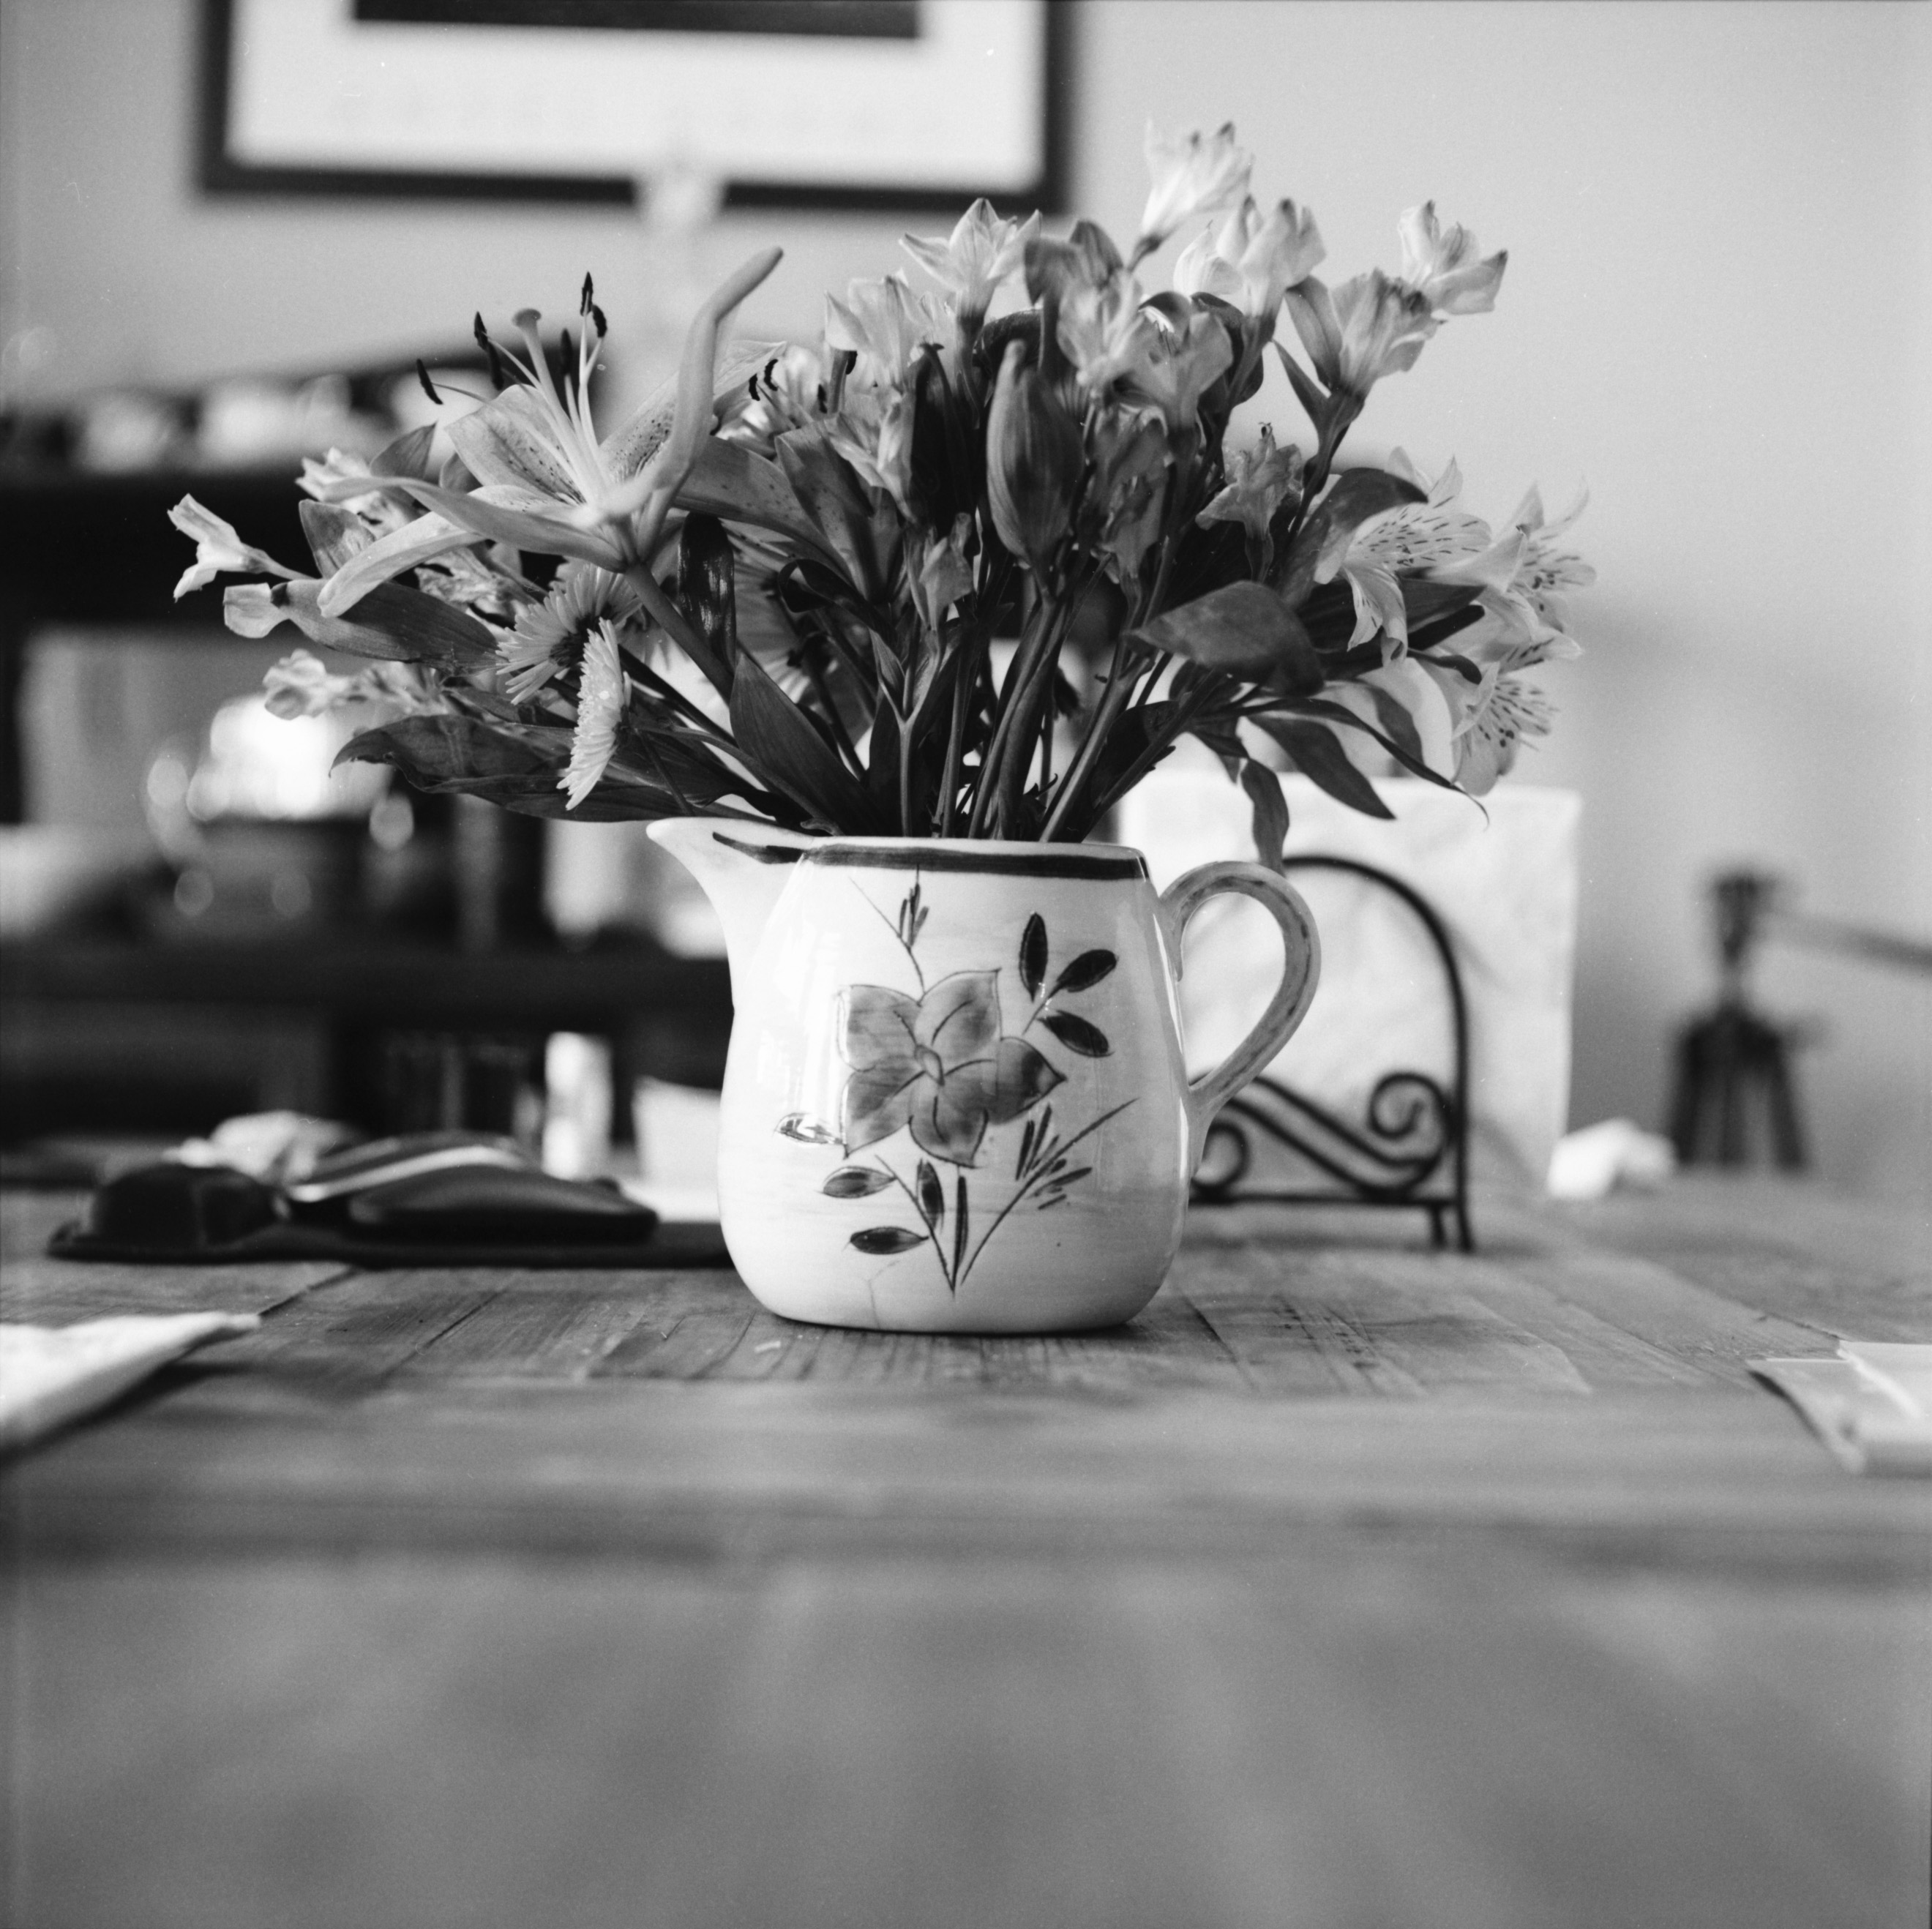


These images are on Ilford FP4 (I like the grain, or lack of it, with FP4). I think I’m getting a little better with focus, and I love the bokeh with this 80mm lens.


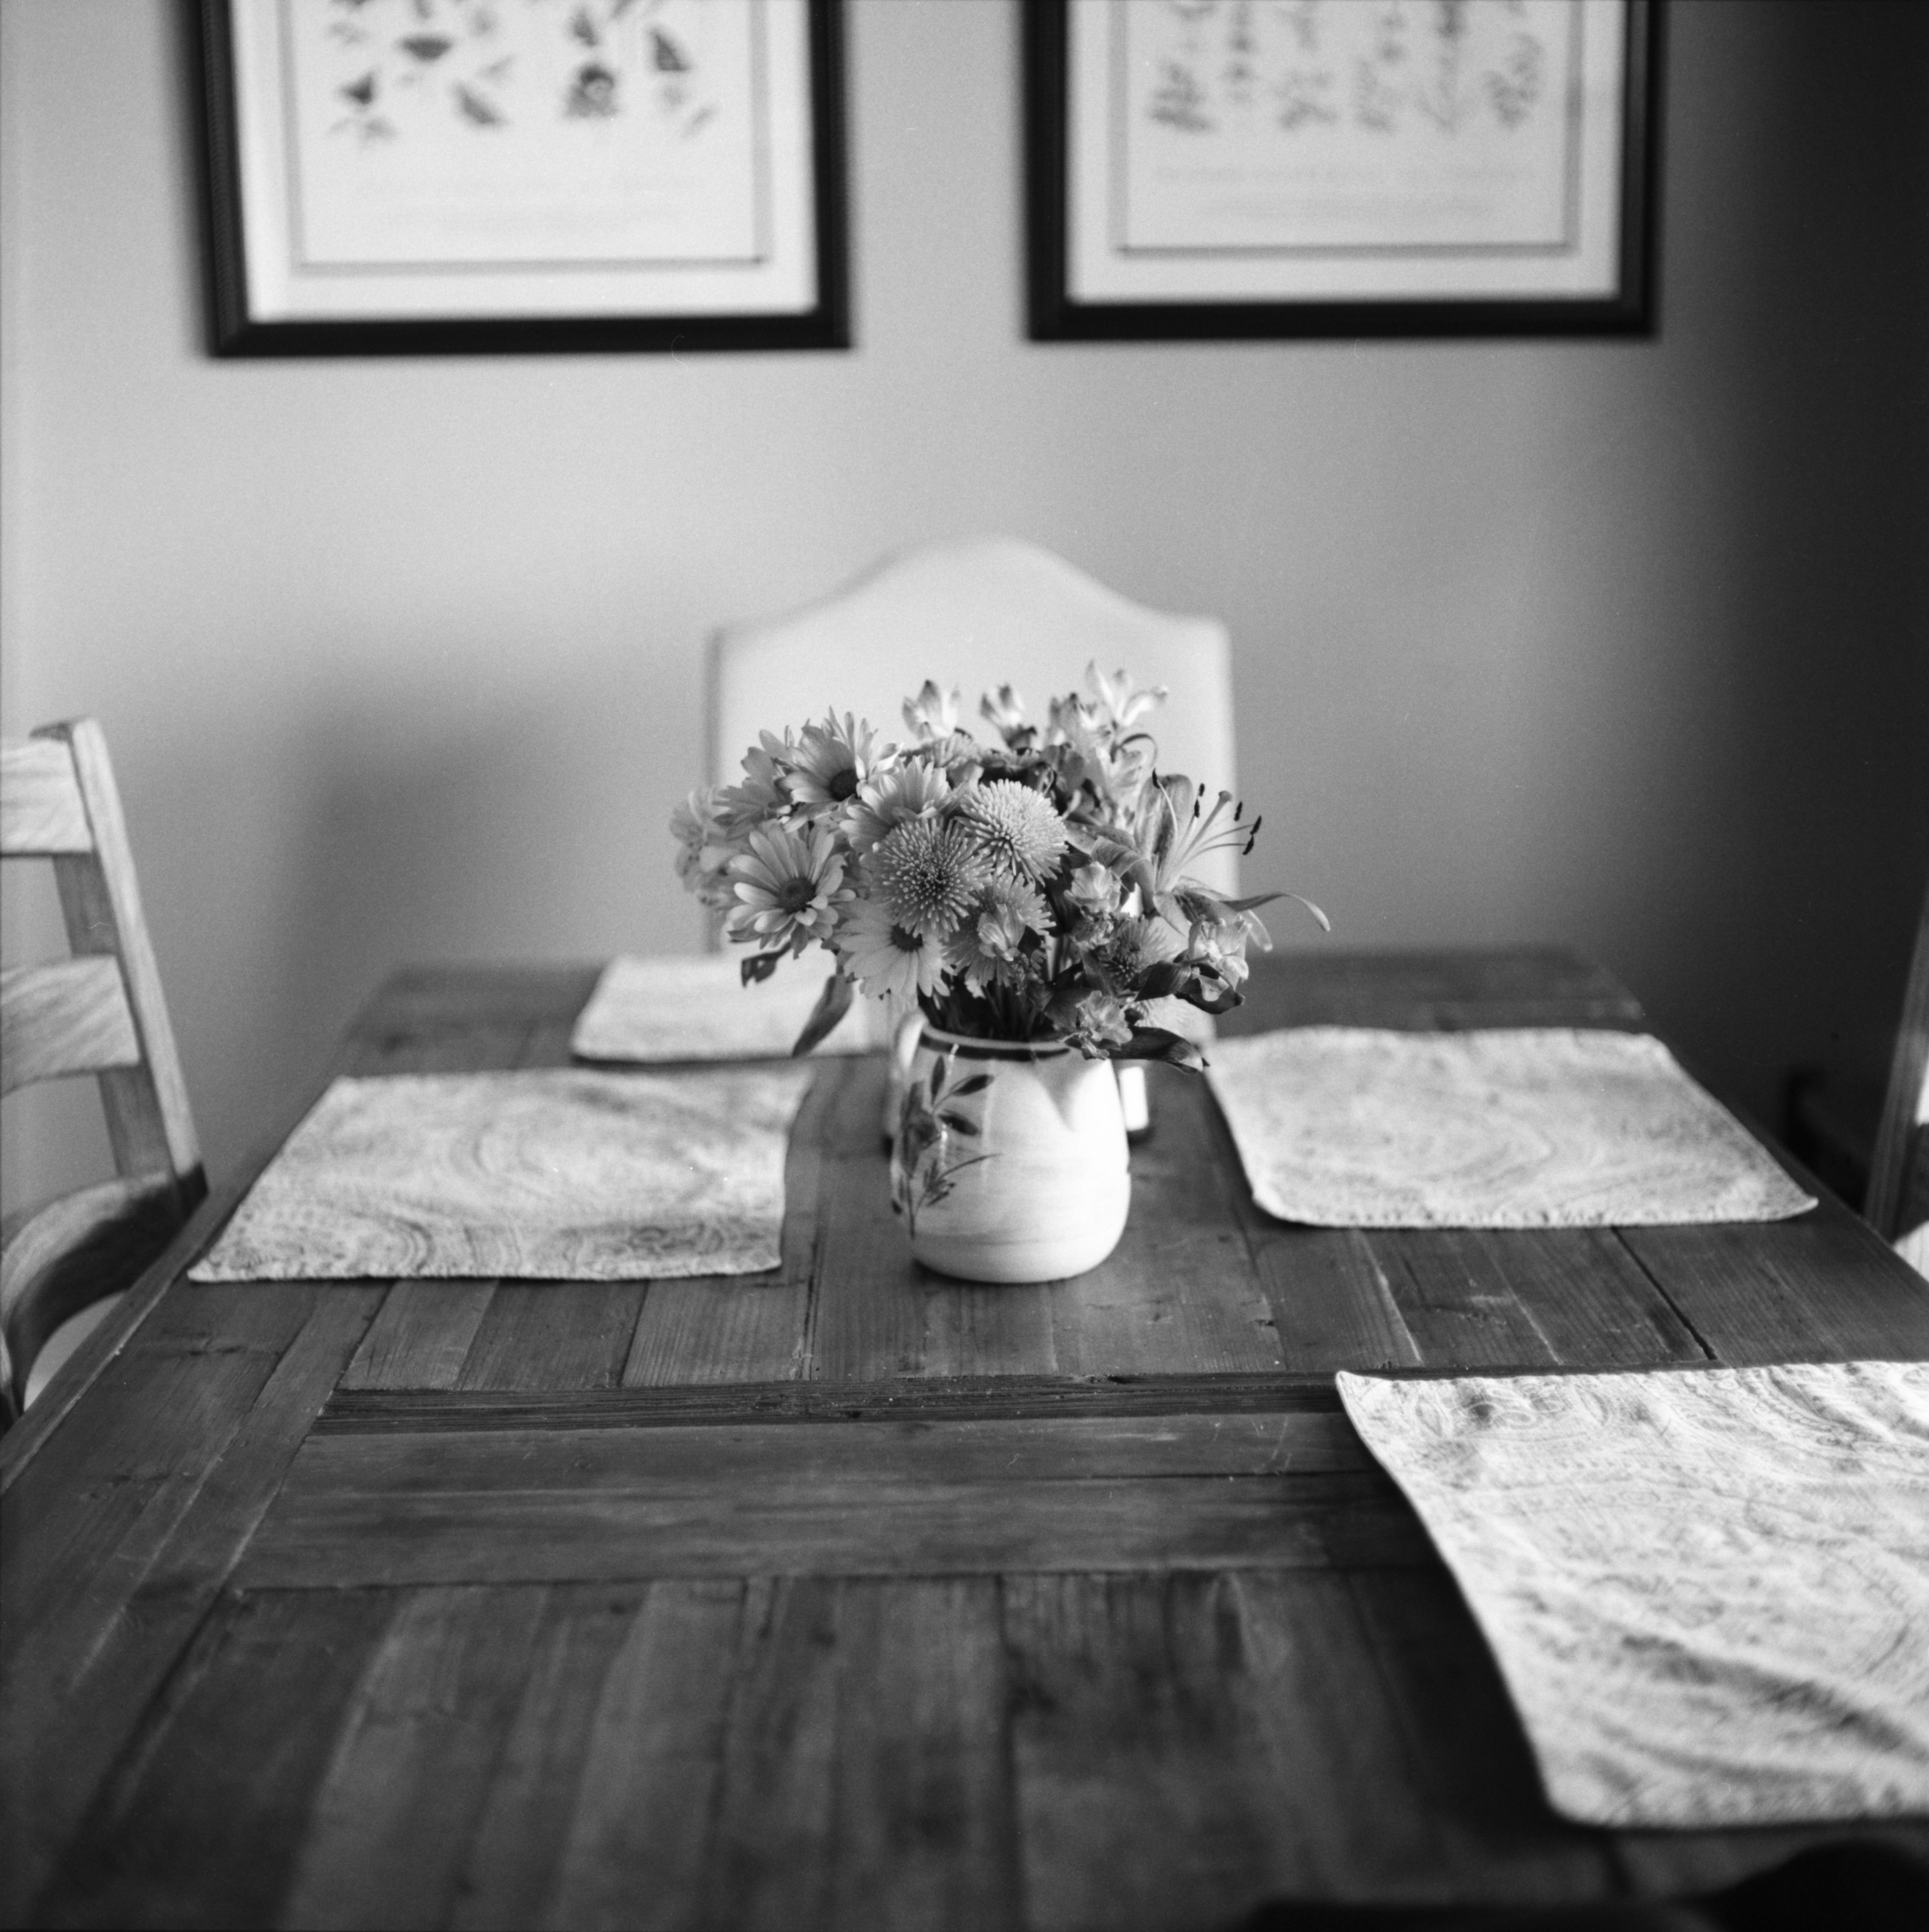
A few more still life photos. Exposure doesn’t seem to be a problem (most of the time) thanks to my Sekonic.
I’d like to get some more interesting images, but until we can travel a little more freely, photos around my neighborhood/house will have to do. Maybe I’ll try to get to a local park with my C330 soon. I will get better at focusing with a little more practice. I really like the smoothness of the grain, and the bokeh shooting at f/2.8.
In case you’re wondering, I’m developing my film with HC-110. I really like HC-110. I used it way back in college (in the ’70s) and it hasn’t changed much. I heard they have a new formula that’s basically the same, but a little less thick. Maybe a little easier to pour and measure.
All in all, a very nice camera. If you haven’t shot with a TLR, or even if it’s been a long time, I’d encourage you to pull out your old camera, dust it off and take it out shooting! Very fun – and it will allow you to slow down a little.

You must be logged in to post a comment.